Lady of Lyme
  • Blog
  • Shop
  • About
  • Products I Love
    • Supplements & Meds
    • Makeup & Skincare
    • Food & Diet
    • Apps & Organization
    • Gift Guides
  • Resources
    • Symptoms/Resources
    • Lyme Vocabulary
    • Printables
    • Books & Reading
  • Features
  • Testing
  • Contact
  • Treatment Info
    • DesBio Treatment Facts
    • My Treatments
    • Treatment Blog

Beauty From Brokenness - Guest Post: Lauren Watt (@laureseasel)

4/4/2022

2 Comments

 
Picture


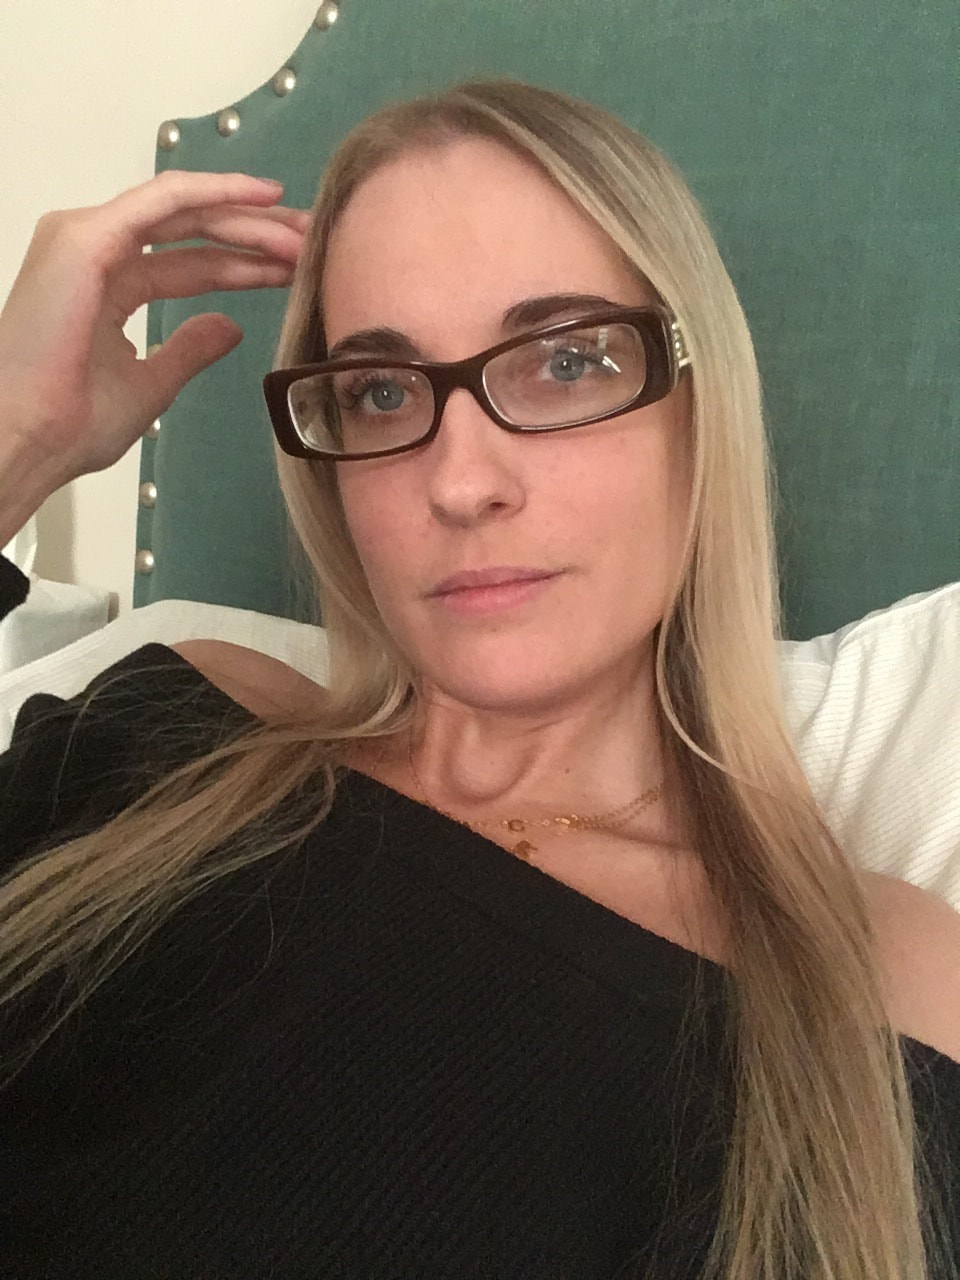
Bio:
Lauren Watt is a young adult Christian who has been in an intense battle with Babesia and Bartonella, Lyme disease co-infections, since 2015. She runs a website, Lauren’s Easel, where she sells her artwork and blogs regularly. She lives at home with her parents and her feathered and furry friends, and she has two older brothers and a sister-in-law. You can connect with her on Facebook, Twitter, and Instagram
.


Every garden begins with breaking. 

Each spring I used to drag my gardening hoe across the dirt to break the soil. Then I dropped seeds into the darkness of the earth and waited for them to break. Meanwhile the clouds in the sky broke to water them.

That's a terrible lot of breaking, isn't it? And yet this breaking is necessary to yield a good crop.

I haven't had a large garden since I was fourteen years old, and I'm now almost twenty-one. But this gardening analogy means more to me than ever. 

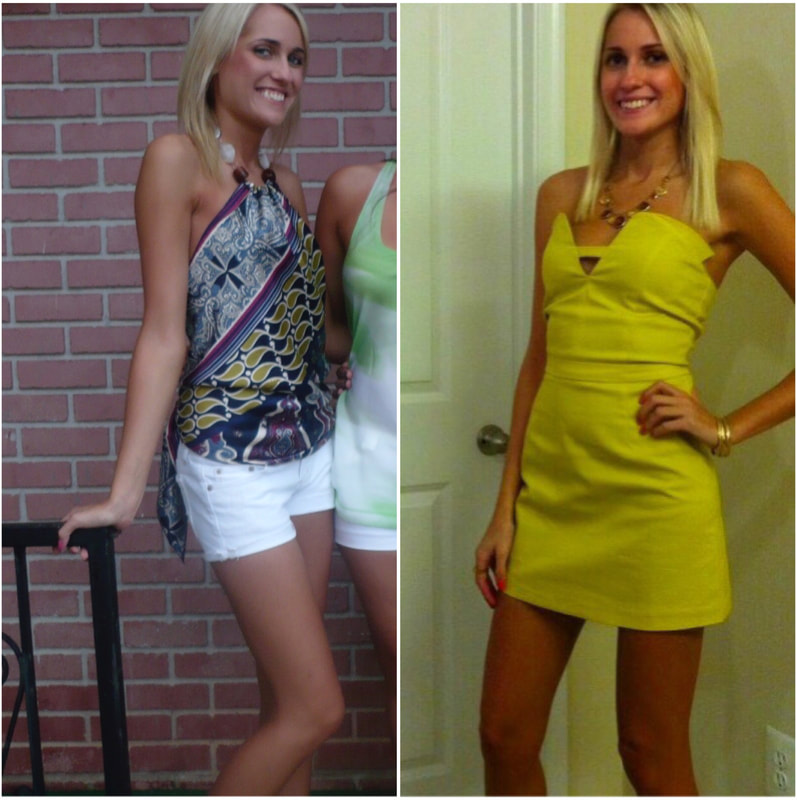
You see, for the past seven years, I've been very sick with Babesia and Bartonella, chronic tick-borne infections. At my worst, I weighed 107 lbs on my 6' frame, was bedridden, and could only eat a handful of pureed foods and smoothies due poor digestion and severe Mast Cell Activation. Brain fog and hypersensitivities to light and sound meant I couldn't read books, listen to music, or watch movies. Even five minute conversations were exhausting. I depended on my family to bring food to my bedside and on my mother to wash my hair. I only left home for medical appointments, and when I did, my family pushed me in my wheelchair. I cried almost every morning because I didn't want to face another day in my body that felt like a prison cell.

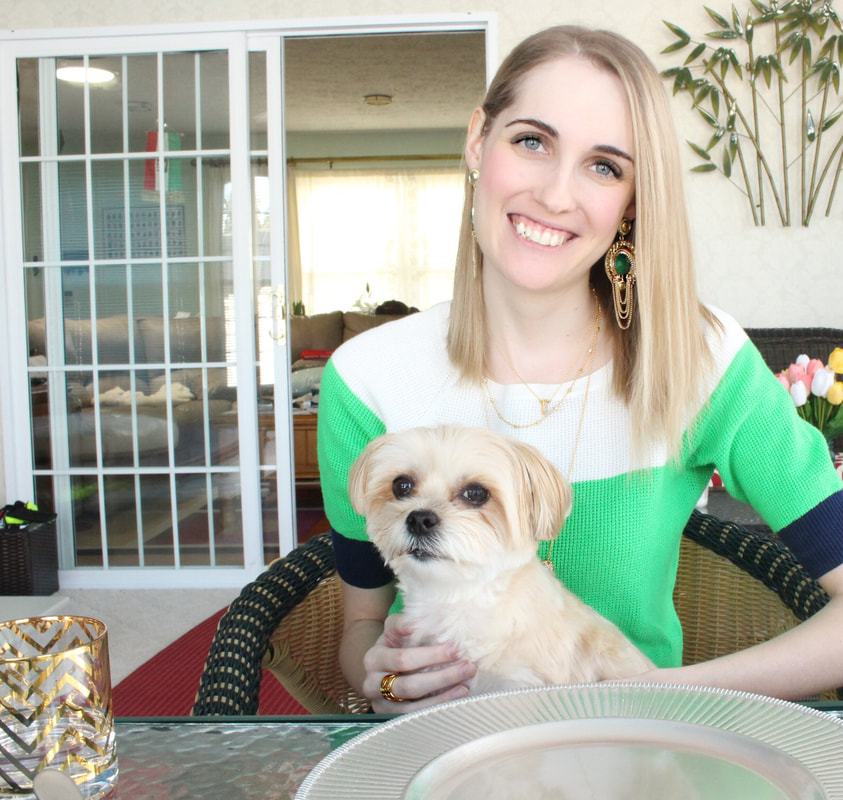
Thankfully, I have since regained weight and can eat a much wider diet. I can spend a few hours out of bed most days, reading, writing, or doing crafts. I can even walk a mile a few times a week, but each day is still a struggle, especially as I increase my antimicrobial treatments that make me herx and feel worse initially.

Because of my illness, I know what it means to be broken. I know what it feels like to be in darkness. And I know what it means to weep. That sounds a lot like what the ground, seed, and clouds experienced, doesn't it?

Sandra King once wrote, "The tiny seed knew that in order to grow, it needed to be dropped in dirt, covered in darkness, and struggle to reach the light." First gardening and then my illness have taught me that there is growth that can only originate in darkness and brokenness. 

In his song, Nothing Is Wasted, Jason Gray sings,

"The hurt that broke your heart
And left you trembling in the dark
Feeling lost and alone
Will tell you hope's a lie
But what if every tear you cry
Will seed the ground where joy will grow

It's from the deepest wounds
That beauty finds a place to bloom
And you will see before the end
That every broken piece is
Gathered in the heart of Jesus
And what's lost will be found again"

I'm still waiting to fully see the beauty God will bring from my brokenness, but I can already see glimpses. My faith is stronger. My relationships with my family and friends are deeper. I marvel at beauty that I used to rush by. I find great joy in what I used to take for granted. I've written encouraging cards and emails I would never have written otherwise. I blog regularly. I've had the opportunity to pray with and for others who are hurting. 

Romans 5:3-5 also says, "Not only that, but we rejoice in our sufferings, knowing that suffering produces endurance, and endurance produces character, and character produces hope, and hope does not put us to shame, because God’s love has been poured into our hearts through the Holy Spirit who has been given to us."

Last May, I was finally well enough to leave home for a shopping outing for the first time in six years, and I bought a pack of sunflower seeds. I rejoiced as my hands again touched dirt and as I planted the seeds in pots on my family’s deck. And in a few weeks, Lord-willing, I'll begin this process again. This process of planting and watching something beautiful grow out of darkness and brokenness.

God is the Great Gardener, and He is using my suffering and your suffering to grow us into people beautiful for Him.

-Lauren Watt
2 Comments

A Full EyeQue Review (with New Glasses)! At Home Vision Testing For Eyeglasses

5/15/2020

0 Comments

 
Picture
Did you know that you can take a vision test and get new eyeglasses all while never leaving the comfort of your own home? Today I'm going to be reviewing EyeQue, the at home vision test company which I recently used. This service is even more important now than ever, but for myself and many others with chronic health conditions EyeQue is a life-saver, and I can't wait to tell you all about it! 

Before we get started I want to say up-front that I have received absolutely zero compensation from EyeQue. I found, researched, and purchased their product myself towards the end of 2019. I had such a great experience with it that I am sharing my review now in hopes that it can also help others. I am not getting paid to post this now, nor have I receive any money in exchange for anything in this post. 

I'd like to start by sharing a bit of background about myself. I have a chronic illness that I've been in treatment for since 2012, and one of my biggest issues has been with movement/motion sickness. The traditional test for glasses where you are shown various prisms ("which is better, this or this?") always made me so sick to my stomach that I could barely get through it. In some instances I never made it all the way through and had to take a break, go back, or start over. I dreaded the test for glasses, and I always wished there were a better way. My eyes are otherwise in great health, I have no other issues to speak of, and I always get an all-clear from my eye doctor. The sticking point for me was always the traditional vision test. So when it came time to get new glasses last year I went on the hunt to see if there were any other options for me, and that's when I found EyeQue. 

So, what is EyeQue? 
EyeQue was founded in 2015 by two men named John and Tibor. They discovered an MIT patented technology that could create a smartphone powered refraction test which rivaled traditional room-sized
 ophthalmic refractometers. They took this technology and developed optical smartphone attachments and a mobile application which would allow people to test their own vision anywhere in the world. 

This is when the VisionCheck tool was invented. VisionCheck is a little device that attaches to your smart phone, and with the help of an App you can easily take a vision test. You can watch a video on how it works here. The VisionCheck is a Bluetooth powered refractometer that measures your refractive error, i.e your nearsightedness, farsidedness, and astigmatism. Test results are given in the same format as your prescription, so you can easily order glasses online. Results will also include your estimated near-vision add (NV-ADD+) for reading or progressive glasses. As someone who has astigmatism I was ecstatic that I could use this! 
Picture
Reading everything about how high-tech and advanced the VisionCheck is would likely make you think it costs an arm and a leg. But no, it's only $69! I know, I too was floored by this price, and so grateful.  The mantra of EyeQue is "Vision is a right, not a privilege," and boy do they keep their word. They have made the price point of this device so accessible. Families can share a device too, so this can be used as many times as needed for as many people as needed which is even more incredible. It also comes with the PDCheck which is a pair of glasses you put on to instantly check your pupillary distance. This was incredibly helpful for me because I don't have an evenly spaced pupillary distance, so trying to use a measuring tape has been a terrible method for me in the past. 
Picture
Picture
My Experience

Now that we discussed what EyeQue is and how it works, I want to go over my experience with operating the device and ordering glasses. When I opened the box I saw easy instructions telling me to download the EyeQue application to my phone. From there the application was very easy to follow; I attached the VisionCheck to my phone and followed the steps on the screen. The process of actually doing the vision test takes a bit of getting used to. There are practice rounds you can do until you get the hang of it. I found it pretty easy to pick up, and had no trouble seeing what I needed to see in order to progress to the actual test itself.

​When the time came to take the official eye test I was told I had to do 3 full tests in order to get my Eyeglass Numbers. One full test consists of 9 prompts for the left eye and 9 prompts for the right eye. It took me about 10 minutes max to complete 3 full tests. However, I wanted to keep going because the more eye tests you perform the stronger the Eyeglass Numbers will end up being so I did 6. I want to also note that doing this eye test was a breeze for me. I did not get motion sickness, I did not feel dizzy, and I never had any eye strain. 

However, since I was being cautious and because my eyes can tire out quickly I decided to let my eyes rest and do a few more tests the following day. I completed 13 full tests, and you can see my numbers below. I want to note that you do not have to do 13 tests, but I did this many because I know I struggle with motion sickness and eye fatigue. I wanted to make sure I could rest my eyes in case that might affect anything. 
Picture
Ordering & Trying Glasses

Now came the time to order my glasses, and I was so excited! I used EyeBuyDirect because their frames are incredibly affordable, very trendy, and they allow you to input Eyeglass Numbers to get your glasses. Shipping was super quick and I was able to get the extra thin lenses which I was jazzed about since I have a pretty high prescription. Frames there start at just $6, and the ones I chose were $45. With the lenses I paid about $100 and I consider that to be a total steal considering I order all the extras on my lenses. If you chose to use EyeBuyDirect you can use code IFBLIKFACF for $10 off your order. 

​My new prescription wasn't a huge jump from the last one (I was at -5.25 and -6.00 prior), but it was enough of a shift to make me nervous about getting new glasses. Again I come back to motion sickness issues here, because if the pupillary distance isn't exactly right that can be enough to make adjusting near impossible for me. Luckily it seems that the PDCheck was on the money because my glasses were perfect! I could see very sharp (but not too sharp), suddenly I could read text on TV that I wasn't able to prior, and I had a smooth transition adjusting as well! I opted for a thicker frame this time around, and I really love them! 
Picture
All in all I could not have had a smoother experience with this. The VisionCheck device does take some practice to get used to, but once you get the hang of it the process is easy peasy! As someone who has been dreading getting new glasses the relief I feel since I found EyeQue has been astronomical. I like to avoid trips to the Doctor as much as physically possible because there has always been a risk for me with catching a virus that is much tougher for me to deal with. Especially in times like now the more we can limit exposure the better. So I highly encourage you to try the EyeQue system from the safety of your home first and foremost if you need new glasses! 

As a side note I asked my eye doctor if he could translate my Eyeglass Numbers into a contact prescription, and they were able to do that for me. Since I already wore contacts they knew my measurements and what not, so all they had to do was update the actual prescription itself. The contacts I received work perfectly for me as well. If you've never worn contacts before this likely won't be possible for you, but if you have then ask your eye doctor if they would be able to help.

If you have any questions at all please comment below and I will get back to you! I hope this review was useful to someone!

xoxo,
Christina 

0 Comments

How To Prepare for The Coronavirus (COVID-19). A Checklist of Everything You Need

2/26/2020

0 Comments

 
Picture
Fears of the Coronavirus are mounting, and rightfully so. Cases keep growing by the day, and the spread to countries outside of China are of even greater concern. The good news is that now is the window of opportunity to prepare yourself. And no, I am not just talking about being prepared with things like masks and supplements (although I will touch on that). I'm talking about being prepared for supply chain issues, which will surely happen. One thing a lot of people do not think about is that a HUGE percentage of prescription medication is manufactured outside of the United States. We are incredibly dependent on other countries for antibiotics, saline, and other lifesaving drugs. Following that logic down the line, there are also many items that are made using a supply chain abroad (often in China), that can prohibit production. In fact, 94% of the Fortune 1000 companies are seeing coronavirus supply chain disruptions. 

"163 of the Fortune 1000 have tier 1 supplies -those they do direct business with- and 938 tier 2 supplies, which feed the first tier. "That's where it becoming troubling," Nelson said. "It's going to be that item where only one plant is qualified to make that and it's going to interrupt a whole production line." 

This is all to say that you need to think deeper than just the obvious when it comes to a global scale virus. Even if it never reaches the United States, the effects of it surely will. Whether it's a shortage in food, medication, supplements etc it's best to be prepared. This applies double to those who have any kind of chronic illness or health condition. You want to prepare as much as you can now, before the effects and shortages are seen more profoundly. Below I'll summarize all the differently things you'll want (and why), and then I'll have a checklist at the end that you can print. I am by no means an alarmist, but especially when you have a chronic illness you have to be a few steps ahead. The list below is for a general preparedness plan, with many items tailored to the Coronavirus in particular. But you can use this as a list for any kind of emergent situation you might need to prepare for. 
Food

If or when the height of Coronavirus hits the United States supermarkets will get cleaned out in a pinch. That's inevitable. If you take a look at Italy right now there are cities under quarantine and lock-down to prevent the spread of the virus. I'm not saying that would happen in the United States, but in the scenario that it does happen you will want to have things ready prior. Another thing to note with food is that it takes truck drivers to deliver everything, so shortages could be hastened if there is a driver shortage as well.
When it comes to food prep you want calorie and nutrient dense food. Now, if you are someone with a chronic illness that struggles with food allergies, intolerances, or has other specific health concerns around food then I'm going to firmly recommend you stock up on Kate Farm's shakes. Kate Farms makes sole nutrition shakes that you can 100% survive on. Many tube-fed patients use them and even I have lived solely on them for periods of time. These shakes are hypoallergenic, vegan, clean, and packed full of dense nutrition. You can read my detailed post on it here, but for the purpose of this post I recommend stocking up on either the Standard 1.0 or the Standard 1.5 formula. Shakes are easy to store at room temperature and keep for a long time.
​However, when it comes to solid food choices you want to pick things that are dense in calories and can pack a punch with nutrition, while also being easy to store and make. Some people are proponents of keeping Ramen cups on hand and calling it a day. That could work, and for some people it is the best option. However if you can, I would recommend following the list below. 
  • Rice - easy to store for long periods of time, easy to make. You can buy rice in bulk, and you'll ideally want about 20 pounds of rice on hand per person in your household (for about 2 weeks of food). You can buy 20lb bags here, or at your local grocery/Costco/Sam's Club.
  • Beans - (black beans, pinto beans, white beans, garbanzo, lentils). Beans are high in folate, magnesium, potassium, thiamine, and last for a long time. If you vacuum seal them they can last for years. Lentils will cook the quickest and will need the least amount of water. About 20lbs for a household of 4 will do. 
  • Oats - Oats are another food that is easy to store for long periods of time and very easy to make. All you need is water to reconstitute it. You can get 90 servings for about $11 so it's a good bang for your buck. 
  • ​Spices & Sugar - Having spices on hand to season the rice, beans, and oats is important. You can stick to salt, pepper and sugar as the basics or you can add in things like paprika, cumin, Italian seasoning, taco seasoning, etc. This is completely up to your taste palette. I also recommend Honey, as it keeps without perishing and has antibacterial properties. 
  • Oils - You will need to cook with some oil, and the most nutritious options are olive oil and coconut oil. If I had to pick only one it would be coconut oil because it has several uses outside of cooking and is also a natural anti fungal. 
  • Canned Meat - Canned chicken, tuna (tested negative for mercury), sardines or salmon are all great choices because they keep on the shelf and are very nutrient dense. Sardines are high in Omega 3, B-vitamins, selenium, vitamin D and Calcium. Salmon is high in all of those and packs about 84g of protein per can. 
  • ​Potatoes - Most people don't think of potatoes, because they are a fresh produce item. However, if you store them in a cool dark place it can lasts for several months. Another option is potato flakes which can last ages. You can get 65 servings for $12.55
  • Dried Fruit - Dried fruit isn't going to replace the real thing, but it stores great and will work in a pinch. You can get dried strawberries, blueberries, apples, mangos, figs, raspberries, you name it. Choose whichever you like the best. 
  • Nuts/Nut Butter - Nuts are a great way to get healthy fats, calories, and lots of nutrients. You can choose which nuts you prefer because almost every one is available in a spreadable butter format. They last on the shelf a decent amount of time and can be useful to have on hand. I would keep about 2-3 lbs of nuts on hand and 2-3 jars of nut butter. You can always eat them later if they are unused, but they won't go bad. 
  • Water - You will need water not only to drink, but also to cook. You can buy it in gallon sized jugs or in large 16oz bottle cases. You need about one gallon of water per person per day for cooking, cleaning, and drinking. Plan according to how many days of preparation you want on hand. Should you ever run out of bottled water you can purify your own water easily if you have a LifeStraw personal water filter. These are incredibly inexpensive and can filter up to 1,000 liters of water each. Get one (or a few) to have on hand. 
  • ​Butane Stove - You will need to cook your food on something, and a Butane stove is incredibly inexpensive and easy to use. Keep extra butane on hand to power it, and you will be all set. 
  • Can Opener - Listing this because it's sometimes forgotten. You'll need to have a can opener on hand for the canned products listed above. 
  • Pet Food - Don't forget your pets! If you can get extra of their foods, treats, meds, and anything else that are essentials for them. This is a useful checklist specifically for pet preparedness from FEMA.
Medications/Supplements

I'm sure most of you remember the hurricanes that hit Puerto Rico. After that the United States had a serious saline shortage because almost all of our saline was produced there. The FDA reported that over 150 drugs could be disrupted by the Coronavirus, if not more. If you are reading this and you are otherwise healthy then that's great. But if you are someone who depends on prescription medications then it likely makes you feel very uneasy. Should the virus never become a problem in the United States, the effects of this could still be problematic. If you can ask for a 3 or 6 month prescription from your Doctor, do so. If you have controlled substances (which can typically only be filled month to month) you might want to ask your Doctor for a one time exception for a single month back up. Some Doctors will oblige depending on the situation. Basically, if you can get ahead of it then do so now. There are also going to be various supplements that will fly of the shelves quicker than others because they are particularly useful during a viral outbreak. If you depend on these for other health reasons, stock up now before they get bought up. Or perhaps just want to have some things on hand for general protection/ability to help ease a respiratory virus. Either way, I have compiled a useful list. As always, consult your Doctor about any supplements that you aren't used to taking. 
  • ​​Electrolytes/ORS - I put this at the very top, because staying hydrated is crucial. And if you are sick it is doubly crucial. When you have a fever you dehydrate quickly, and water alone won't be enough to rebalance the electrolytes that you've lost. Oral Rehydration Solutions are going to give you the most bang for your buck. They are used in third world countries for rapid rehydration because they can work as well as an IV. I have a full blog post on ORS here, but my top recommendations are Hydrant and Ceralyte, because they are both clean and very potent. Hydrant comes in packets that go into water and Ceralyte comes in a ready to drink carton. I keep both on hand at home, but either will do. 
  • Elderberry - Elderberry is a great anti-viral. A lot of people take it during flu season, but also year around for immune support. I like these because they have added Zinc and Vitamin C (so you don't need to take it separately), but some people prefer a potent syrup like this.
  • Vitamin C - Another immune boosting necessity. It's great if you're sick to boost your immune system or to keep your system strong and protected. Buffered Vitamin C is going to be the most gentle on the stomach, but any form you like best is great. 
  • Zinc - Zinc often goes hand in hand with Vitamin C because of its immune boosting mechanism. Low zinc levels leave you more susceptible to picking up infections, and it's commonly low with various chronic illnesses that deplete zinc. Having zinc on hand to stay protected is always wise, and if you depend on it daily then make sure you have enough should it fly off the shelves. Zinc can easily upset your stomach, especially if you're sensitive. My stomach is really sensitive, and I found that taking sublingual Zinc after a meal is the best way to ward off nausea. 
  • Vitamin D3/K2 - I know you know what I'm about to say.. yes Vitamin D is critical for immune health as well. It's best to take Vitamin D balanced with K2. Vitamin D helps calcium properly absorb, and K2 directs the calcium to bones instead of your arteries (where it can cause calcification). Taking D3 daily is good practice, especially if you live somewhere without sun this time of year. 
  • Multivitamin - This might seen obvious, but not everyone takes Multivitamins. So, during fears of a pandemic there will be a surge in multivitamin purchases. If you have a brand you love then stock up so you don't face a shortage. If you don't have a favorite yet, I like this one. 
  • Oscillococcinum - This might be an unknown supplement to you, and honestly I only learned about it last year. It's a homeopathic remedy that can halt or significantly lessen a cold/flu. I know it sounds a bit 'out there' but take a look at the thousands of Amazon reviews stating that they have no idea how it works, but it does. I firmly stand by this. Last October I caught some kind of flu and I was miserable. Someone recommended I try Oscillococcinum, and I was desperate so I got it. All I can say is I have no idea how or why, but it works. I have no idea if its effective against something like Coronavirus, but I do know that if you catch the flu or strep your immune system will be more susceptible to picking up another respiratory virus. So having Oscilloccinum on hand is going to be very useful should you find yourself in that situation. It sells out quickly at Walgreens on Amazon, so if you find it available I would definitely grab it. 
  • ​Ibuprofen/Acetaminophen - Both Ibuprofen and Tylenol are anti-inflammatories and fever reducers, and a staple item that could face a shortage. You'll want to make sure you have enough on hand. This also applies to things which use Acetaminophen like Excedrine (if you depend on that). 
  • Mucinex/Expectorant - If you happen to face an upper respiratory illness of any kind you will want to have an expectorant on hand. This will help with chest congestion and loosening mucus in your lungs. This will likely be out of stock as the weeks go by and fears of coronavirus kick up. If you don't have any yet I recommend buying some now. You can buy the classic Mucinex with guaifensen, or you may want to opt for a liquid herbal variety. Both will work great. I also want to recommend Hylands Cough & Mucus which is a homeopathic liquid that is fantastic. I can't possibly sing its praises any higher, it works like a charm for excess mucus and chest congestion. 
  • Thermometer - If you don't have a good thermometer on hand yet, grab one now. I will say I have seen tons of thermometers go out of stock on Amazon in the last week, especially the forehead thermometers. 
  • Pulse Oximeter - A pulse oximeter is a little device that goes on your finger and tells you your oxygen saturation. This is useful if you have an upper respiratory infection and you're worried about it. It's nice to be able to check and see if things are still ok or you need more assistance at a hospital. They're cheap and theres no reason not to have one somewhere in your home. 
  • ​Thymuline - Thymuline is a potent homeopathic remedy that supports the function of the Thymus and naturally boosts the immune system. You only need to take this once a week. Thymuline is especially beneficial when suffering from excess mucus or bronchial problems during cold, flu and allergy season. Benefits include: boosting the immune system, helps fight viral and bacterial agents, prohibits and alleviates respiratory diseases, promotes overall healing and recuperation after prolonged illness. My whole family has been taking this weekly for the last year and it's great. It's not a must have, but I do recommend it. 
  • ​Vapor Rub - A vapor rub will be your best friend if you find yourself with an upper respiratory illness. You can always get the classic Vick's Vapor Rub, but I really love Marty's Natural Vapor Rub which uses essential oils. If you need something in a pinch you can also put a few drops of Eucalyptus oil into some coconut oil for a similar effect. 
Cleaning Supplies/Masks
​
  • Clorox - Here is a list of all Clorox products that are guaranteed to kill Coronavirus. I recommend and swear by these Hospital Grade hydrogen peroxide wipes. I use them all over the house, and they don't smell terrible, yet work great. Some people with chronic illnesses are sensitive to the harsh scent of bleach or chlorine, so the hydrogen peroxide wipes are excellent. 
  • Disinfectant Spray - Here is a list of all Lysol products that are guaranteed to kill Coronavirus. However, Lysol can be very irritating for those with chemical sensitivities and other health conditions. There is an alternative spray from Seventh Generation, and my family has been using it for years. It is just as effective as Lysol but isn't full of triggering chemicals. It is scented only with essential oils and is very mild. ​
  • Antibacterial Soap - It's always helpful to have antibacterial soap on hand during flu/virus season, and I think it's good to have for all households. You can find various hospital grade soaps such as Medi-Stat or Hibiclens. Any variety will work. 
  • Extra: PhoneSoap - This is not a must have, and it uses electricity so in an emergent situation it would not work. However, in a day to day scenario where there is still plenty of electricity and water yet the coronavirus is prevalent, this will be immensely useful. Your phone is one of the most common ways you pick up germs. Phones are disgusting, and they harbor about 25,000 bacteria per square inch. A phone soap is a little box that uses UV light to kill all the germs, bacteria, and viruses on your phone. All it needs is about 5 minutes in the box and it's done. I put my phone in mine every single day, and I would recommend using it more often if there is an outbreak.
  • Nitrile Gloves - Having gloves on hand is useful if someone in your household is ill. Being able to have a barrier with things you touch will prove to be helpful should you find yourself in that situation. Most people don't keep gloves on hand, but they're inexpensive and 2 boxes would last you a long time. 
  • Masks - I'm sure you've seen the disposable paper masks all over the news. Those are useful if someone is sick because it helps prevent spreading the virus. It would be good to keep some on hand just in case. However, if you want to prevent air-borne particles like bacteria and viruses reaching you then you will need more than just a disposable mask. This is where masks like Cambridge Mask come into the equation because they have an N99 military grade filter on them. They can filter out over 99% of all viruses and bacteria. Because of the coronavirus there is a mass shortage of N95/N99 masks all across the board. Cambridge Mask is backordered until late April (at the time of writing this). There are still a few options I could find, like this one, that would work as well. I've also seen people mention that places like Lowe's and Home Depot have N95 masks in store that could work in a pinch.
  • ​Hand Sanitizer - I like to use a fragrance free and alcohol free version such as this one, but any kind will do. I also use Smart Silver (from DesBio) around the house to disinfect my hands and I keep a small one in my purse.​​
Household Items
  • Battery Banks - Having something like a Mophie (for your phone), or other battery banks on hand will be very helpful should you be in a situation where the power is out. If you look around your house think about how many devices you have that depend on a charging cable. A few battery banks will give you peace a mind in any situation (not just with coronavirus) where there is a lack of access to electricity. 
  • Extra Batteries - Having a selection of batteries on hand for various things around your house is always a good idea. You never know when they will get disrupted in supply chains and you'll need them to power important devices. If you need a computer for work it would also be smart to buy an external hard drive to back up your computer as well as a power bank to charge it should you need it.
  • High Lumen Flashlight - Most people already keep flashlights around their house, but I added this as a reminder in case you don't have any lying around.
  • First Aid Kit - Not only do you need to have a first aid kit for yourself, but also for your pets. If you already have one make sure everything is good to go and nothing is expired. 
  • Toilet Paper/Hygienic Products - You don't want to find yourself without these, and there is no risk to stock up since you'll end up using it down the road should you not need it now.
  • Radio - I know this is old school, but if you don't have a radio in your home they are super cheap and wise to have. If for any reason the power goes out and your phone dies then you'll have no way to get info. I don't know how applicable this will be for the Coronavirus, but this list is useful for any kind of emergent situation so I had to include it.​​
There are many benefits to being prepared ahead of time. Best case scenario nothing happens and then you have these items for the future. Remember that things like natural disasters or other sudden unforeseen circumstances can hit down the line (in any country), and this way you will be ready for anything. Making plans just in case you would need to stay home for 2-3 weeks is wise. I reference Puerto Rico and the saline shortage because that was felt by a lot of people on a large scale and served as a reminder to make better plans. If you are dependent on things like Saline, alcohol wipes, tubing and have some kind of port then get as much stock of medical supplies as you possibly can. 

Staying ahead of the curve will serve you well no matter the situation. There is no need to panic or be overwhelmed either. This is mostly about asking yourself if you are set up at home to have some things for a couple of weeks if your household needs to stay at home for whatever reason. If you can't get everything at once try to collect it little by little. The key is to take whatever steps you realistically can without causing yourself more anxiety in the process. 

If you have other tips or products to add, please leave it in the comments below for other readers. 

xoxo,
​Christina

Printable Checklist
You can download the file below
preparednesschecklist.pdf
File Size: 43 kb
File Type: pdf
Download File

0 Comments

Food Marble by AIRE Review - An Honest, Unbiased Patient Review

1/9/2019

113 Comments

 
Picture
If you’ve been following this blog then you likely know all about my tummy troubles. But for those of you who may not, I’ll give you a quick summary.

I struggle with a whole host of fun stomach issues. I have Crohn’s Disease and also many food intolerances & sensitivities. I, like many, react poorly to high FODMAP foods. As much as I adore garlic and onions, they are the bane of my stomach’s existence.

I have a lot of trouble understanding my ever changing stomach’s needs. So often I will swear I am eating “safe” foods, yet I still look 6 months pregnant with bloating while also being in a lot of pain. Pinpointing my problem foods is a full time job, and that’s why when I heard about the Food Marble I was instantly sold. It’s this cute little gadget which is marketed to be an at home food tracker. It makes use of a breath test to see if the food you ate did or did not agree with your body. It helps track problem foods & makes it much easier to see which foods have trouble digesting properly.
First of all, let me take some quotes from the Food Marble site to explain exactly what this little gadget does.

“Hydrogen breath testing is available in the best hospitals in the world. We miniaturised the technology and made it accessible to everyone. When you eat something, it travels through your stomach and into your small intestine for absorption. If it's not fully digested, the remainder continues on to your large intestine where the bacteria start to break it down by a process called fermentation. ‎Hydrogen is only produced during fermentation. This hydrogen makes its way into the bloodstream and begins to circulate around the body, moving to the lungs. ‎Once it reaches the lungs, the hydrogen is exhaled on your breath. When you breathe into your device, you can measure the level of hydrogen at that time.”

So to summarize, this breath test is done via the device, and it tells you how high your fermentation score is. The higher the fermentation = the more hydrogen in your breath. This indicates a food which is not jiving well with your body.

I was so so excited for this item I actually pre-ordered it, then I waited patiently to receive it. Finally in early December it arrived. I instantly got it out of the box and did a test which showed that I had very low fermentation. I ate a safe meal for dinner that day, so it made sense. The instructions come with satchets of FODMAP’s which you can drink to trigger a reaction. This is useful to test or calibrate your device, or if you are someone who is unsure if FODMAP’s affect you.

I can already confirm I am FODMAP sensitive, but I still wanted to test things out because I’m curious by nature. I ate a lot of high “no-no” foods, and after that I expectedly had mass amounts of bloating, pain, acid reflux & stabbing knife aches all over. I used the Food Marble every 30-60 minutes post meal and not once did I get an elevated result. In fact, I got “very low” each time. Very low, as you can see, shows up as just a small little blip because it’s about 0.1-0.3 and it’s so low it barely registers. How is this possible? I have no idea.
Picture
I repeated this process, maybe because I’m a masochist, but more so because I am a sucker for understanding how things work. Each time I got low or very low. In fact, in my over 50+ readings I never once got anything higher than “low 1.5.”

At this point I realized my device didn’t work. For whatever reason it very clearly wasn’t matching up to what it should be. I was bummed, but figured I would reach out to customer service for some trouble shooting. This device comes with a 1 year warranty if it’s not working properly. Although they don’t give you any info as to HOW to get ahold of someone, which I already found a little worrisome.

Well, to say that it’s near impossible to get ahold of Food Marble support would be a massive understatement. For the last few weeks I have tried every avenue of contact with the company multiple times. I have used their “contact form” online. I have sent emails to TWO different departments. I have tried their online chat in their help section. I have tried it all. Almost daily I was resending an email. I even DM’d them on Instagram. Radio silence. Not even a simple “sorry were overwhelmed with requests, we will get back to you.” Nada.

Their online chat function let’s me know someone definitely saw my message, but didn’t care to reply. I’m also pretty positive that they have gotten my multiple emails. It’s frustrating when you pay $150 for a device, and then 0 customer support after the fact.

This led me to search online to see if I could find any unbiased reviews which actually show a real patient using the Food Marble. Guess how many I found? Zero. So now the question becomes, how legit is this? It would be so easy for them to sell this device and then vanish when any issues arise. Good luck fighting with your bank to get that money back. Oh, and their base is located overseas, so double “good luck” to get a cent of your money back.
Picture
I did a little more digging and noticed that their social media presence has been radio silent since the pre orders got delivered. Once they switched from pre order phase (after customers got the item) into regular ordering phase there has been no social media presence at all. Weird right? They were so active when they were trying to secure pre orders, and then poof gone. And rightfully so; their most recent post from Dec 12th is riddled with frustrated customers who have issues with their device and can’t get ahold of a single person.
Picture
Picture
So by now I have come to the very sad conclusion that this company isn’t dependable, and it’s questionable if ANY of the devices even work. From what I could find of real people commenting on Food Marble’s social media posts, it doesn’t seem like there is one single satisfied customer. Now listen, I understand a new tech company having some glitches or growing pains. BUT, and this is a big but, they should be keeping their customers informed. Whether it’s by email, by social media, or both, they have no excuse to leave people out in the dark for a month (how long they have been radio silent). More so, let’s assume they’re just overwhelmed by pre-order issues and haven’t gotten around to all the emails. Fair enough. Then they should never have put the item up for regular sale and should hold off on selling new units. But they aren’t doing that, you can go buy it right this second if you want which tells me that’s not the case.

With all the customers complaining of issues it’s irresponsible to continue selling units until the glitches are ironed out in the existing batch of units. Any company that holds such a low standard of operation holds no regard for their customer base either. Be careful if you’re thinking of giving them $155 because you might end up with a chunk of plastic and a hole in your bank account.

I’m really bummed to have to write a crummy review, but I have to be honest. Exploiting sick patients who don’t have extra money to spare & then knowing that they can’t touch you because you are overseas (and don’t take PayPal), is really low.

I don’t recommend this device, and further don’t recommend this company. I will update this post accordingly if I ever get a reply back from them, and if I ever get my Food Marble working. If they step up, fix their customer service issue, help me (and others), and repair the device then I will update my post with all of that info. This post will be totally honest and transparent every step of the way.

​xoxo,
​Christina


UPDATE (3/9/19): 

As many of you saw in the comment section below, Lisa (one of the co-founders of the Food Marble) reached out to me to talk via a phone call. We did speak for about an hour and I will fill you all in on what we discussed and what the plans are moving forward. But to give you the full picture, a little bit before Lisa formally reached out to me I got an email back from customer service. They told me my device was working fine and maybe I just eat too fast and get a lot of air in me which is why I'm bloated after some meals (not due to any other underlying process). I explained that no I had Crohn's, I'm sensitive to FODMAP's and it has nothing to do with trapped air. This convo wasn't really too productive, so I am glad that Lisa jumped in to help bridge the gap. I will go point by point to make this easy for you all! 

1. Lisa explained that as a new start up they got very overwhelmed and behind when they launched, which is why it took so long to get replies. I explained that a simple status update on their Facebook/Instagram/Twitter page to tell customers this info would have made a big difference in the trust of patients. She agreed and said if that happens again they will do so. She also said a good email to use for help is hello@foodmarble.com. Their turn around time for response is 1-2 business days (not counting weekends), but if they get a promotion or advertisement which drives interest this could flood their emails and set them back a bit. But typically 1-2 days. 

2. In Lisa's comment below & also in the email I got from FoodMarble customer support I was told that my device was checked and tested to be working well. This confused me (and others) as to how they could test my device from a far. I inquired about this and Lisa explained that each FoodMarble device is calibrated before it is sent out. It is calibrated with different levels of hydrogen to make sure it is properly measuring, and all of that info is logged into their database. Then, when a customer has an issue with the device they are able to look back at the customers past breath measurements (stored in the device history), and compare those readings to info from their database. Basically they compare the info they have during calibration to the info from the patients testing to see if they line up. I hope this makes sense!

​3. Here is a portion of Lisa's comment below which I got a lot of questions about: "
I can see that when our engineering team looked at your device data, it showed to be operating normally. There can be other scientific reasons for not getting a high response, which are quite rare, but I wonder if that's what's happening here. For example I wonder if you are in the small minority of people who do not produce breath hydrogen."

So what does it mean to not produce breath hydrogen? Well, it turns out that there are some people who have gut bacteria that makes methane instead of hydrogen. In those cases the FoodMarble would not work because it is calibrated only to record breath hydrogen. So if you are someone who doesn't produce hydrogen then this device will not work for you. 

​In my case I explained to Lisa that I did do a hydrogen breath test in the past for SIBO and therefore I am quite certain I produce hydrogen because I got a positive result. So for me, it didn't seem like that would be the hiccup, but we decided to properly test it. She is sending me a Lactose packet to take a proper hydrogen breath test (like the ones you do for SIBO), to see if that triggers anything in the device. I will let you all know how that goes when I receive the packet and do the test. This is coming from Ireland so I don't know when it will arrive, and I am currently in the middle of a flare with my health so I don't know when I will feel up to the breath test (as it typically makes me pretty sick to my stomach). But hopefully in the next few weeks I will have some info to update on that.

I inquired further about non hydrogen producers and asked if someone buys a FoodMarble and doesn't know that they don't produce hydrogen (and the product doesn't work for them), if they can return it for a refund. She said at the moment, no. And thats because they are a start up and its too much of a cost to eat for them. They are looking into ways to make it fair for the consumer and to remedy it, but at the moment there is no way to get a refund if you find out you are a non-hydrogen producer. If you have done a breath test for SIBO in the past make sure you check your paperwork to see if you produced methane or hydrogen, because the new SIBO tests typically look for both. 

4. The last part of our plan is to have someone else I know eat a high FODMAP meal and take a breath test at 1 hour and 2 hours post meal to check my current device that way. I don't have anyone close to me who has digestive problems, so I am unsure if this will work, but Lisa said that often even those without GI issues will produce hydrogen in response to FODMAPs. I will be trying this in the coming week or two as well as I can. She is also sending me a new device to swap out and see if it works better. I will update on both counts when I have some answers!  
UPDATE (4/16/19):

I had someone I know eat a high FODMAP meal full of beans, garlic, onions and all the works. They then did a breath test on my original device (the one I believe is defective) at the 1 hour and 2 hour mark post-meal. The readings were 1.2 and 1.5 which are both very low. 

I will now disconnect this original device from my phone and sync up the new device and will try using it myself for a week to see how it responds. Then I will again have someone I know eat a high FODMAP meal and test this new device out in the exact same manner. I will update this post accordingly. 
UPDATE (9/25/19)

Apologies for the long lag between updates, but I'm here now! 

1. First things first I had someone else test the new device out by eating a high FODMAP meal full of lots of raw garlic, cooked garlic, cooked onions, and a side of broccoli. But what I did this time is I had this person eat this exact same meal on two separate occasions to see if the results were consistent. What I got was very mixed. The first time they ate the meal they did spike a high fermentation score 1 hour post meal, but by 2 hours post meal the fermentation dropped by more than half. On day 2 they had low fermentation scores at both the 1 and 2 hour marks. You can see the charts below: 
Picture
Picture
2. I had a second person test the new device out by following a similar testing strategy. I asked them to eat a high FODMAP meal of Mexican food and then take a test at the 1 hour and 2 hour mark post meal. They blew a 0.0 on both, which I didn't even know was possible. Then they had a sugary dairy filled bowl of ice cream topped with nuts and chocolate syrup sweetened with sorbitol and maltitol. And just to make it extra triggering they also ate a chocolate turtle sweetened with xylitol. Same results, it was 0.0 at each interval except one, which was 0.2. I only was able to have this person test on one day (instead of two days), so it was a bit more difficult to decipher why this happened. Perhaps they fall into the category of not producing the correct gas? I'm unsure.
Picture
3. I said earlier that I would do a high-FODMAP test myself, but I haven't been able to. I actually had a bad reaction to a treatment I did earlier this year and it made my Crohn's flare up like crazy. I can't risk a high FODMAP meal right now, and I don't know when I would be able to do so. However, the times I have tested this new device while eating my safe foods it has always been on the lower end (0.5, 1.0, 1.5), but I never got 0.0 reading (like person 2 did above). So I do think I produce hydrogen, but since I am eating safe foods it's hard to get a read on how it would test for me with a triggering food. 

​Overall I think the first device I had was defective, because neither myself nor my testees were able to get a reading other than "low" no matter what we ate. This new device did have a high reading once, so it does show promise that it can properly log it. 

​-Christina 

113 Comments

Give Me ALL the Allergy Free Snacks: Top 10-Free Snack Haul

9/14/2018

0 Comments

 
This post is not sponsored. I bought all of these items myself, and no one paid me to write this review. 
Hi my name is Christina, and I'm a snackoholic. You can often find wrappers or empty boxes all over my bed because I could pretty much snack all day long. While I type this blog post I am aimlessly crunching on some chocolate peppermint bark, and I must say it's making this moment significantly better.

I remember beginning my anti-inflammatory diet many years ago and feeling so deprived. There were seemingly no snacks on the market at the time to fulfill my needs of being made without things like gluten, milk, soy, corn etc in it. Over the years my diet has been ever evolving, and where I used to not be able to tolerate any sugar I can now eat a little bit here and there. This has been a big win, because in the mean time I got more sensitive to dairy, eggs and nuts so it really opened the door for me to try a broader range of allergy-free snacks.

Oh and as a disclaimer, the American College of Allergy, Asthma & Immunology classifies Coconut as a fruit, not a tree nut (as do many other organizations). So for the purpose of this post coconut is not being lumped in with nuts. Tree nuts include almonds, Brazil nuts, cashews, chestnuts, filberts/hazelnuts, macadamia nuts, pecans, pistachios, pine nuts, shea nuts and walnuts.

This post is going to be no frills, just a sampling of some snacks I have come to love which are all top 10 allergy free. Whoo! Some of these also aren't really mainstream, and I had to do a whole lot of internet browsing to find out they exist. But now that I found them I knew I had to share! Some of the items can be found in grocery stores, but I also include online shopping links for everything.
iwon - Sea Salt Protein Chips
These are made of a delightful blend of gluten free flours & beans, and it tastes like an upgraded tortilla chip. Plant based, vegan, allergy free & oh so yum. It's way too easy to eat a whole bag. They come in grab and go sized bags which makes it easy for on the go too as an added bonus. 
Picture
Picture

Natural Nectar - Organic Cocoa Rice Stix
Oh how do I love thee, let me count the ways.... These are the perfect crunchy creamy combo, and are a little slice of chocolate coconut heaven. I had to search for these more than I'd have liked, because this same brand makes another version with hazelnuts and for some reason those were way easier to come by than this coconut variety. As of now I order them online from Swell Market, but they sell them in stores too. I live in a small town so they were no where to be found here, but if you have a Whole Foods or Sprouts definitely give it a look.
Picture
Picture

Trader Joes - Organic Marshmallow Treats
These are Organic, Vegan, Gluten Free, Soy free Marshmallow treats! I repeat, VEGAN and SOY FREE. I think I hit some kind of food lottery when I found these, because I can't explain how much I missed marshmallow treats. Marshmallows are traditionally made with gelatin which are a big no no for me, and most all marshmallow alternatives contain soy protein. When I found these treats I promptly ordered a box and proceeded to be in complete bliss. They taste amazing, and that is no exaggeration. Also, all things considered they only have 7g of sugar (a lot of which comes from the rice itself). They aren't overly sweet, it's just right. If you are lucky enough to live near a Trader Joe's I highly recommend you grab a box (or 5) asap. However, if you're like me then you can order them online from Amazon. Trader Joe's products are organic and high quality so they cost a little more than your usual Rice Krispy treat, but its so worth it. 
Picture
Picture

free 2b - Peppermint Bark & Mini Sun Cups
These yummy little guys are top 12 Allergen free, and they taste way better than their mainstream alternative. The Sun Cups are reminiscent of Reece's Cups, and are perfectly bite sized. They are oh so creamy and smooth, and the rice chocolate is indistinguishable from milk chocolate. The Peppermint Bark is made of dark chocolate with crunchy bits of peppermint inside. I know I've used the words 'amazing' and 'incredible' a lot in this post, but this peppermint bark deserves its own accolade. It's so incredibly satisfying with the blend of peppermint and rich dark chocolate.. ohh the bliss. 
Picture
Picture

Beanitos - White Bean Cinnamon Twists
Do you look back fondly at the Taco Bell cinnamon twists, and wish you could taste that glorious cinnamon crunch again? If so, you are in for a real treat with these. These Cinnamon Twists are made entirely of beans & tapioca with just a hint of sugar, and they taste just like the real deal. If you warm them up a little bit they become almost indistinguishable from the Taco Bell variety, except maybe the fact that they aren't covered in 3lbs of grease. If anything these are an improvement of the original. Some grocery stores sell them, but if not you can also find them online. Thank you internet.
Picture
Picture
Do you have a favorite allergy free snack? If so, I’d LOVE to know, please leave a comment below! That way it will also help out others who come to this post to find more new treats. One can never have enough snacks if you ask me!

xoxo,
Christina
0 Comments

Designing My Post-Giveaway 'Thank You' Cards with Paperless Post

7/30/2018

0 Comments

 
In May I held a giant month long event for Lyme Disease Awareness Month, with tons and tons of Giveaways for patients fighting through chronic illnesses. I was incredibly thankful to the companies who donated their items, and to the Sponsors who believed in me. When the event was over I knew I wanted to send a formal Thank You card to all of the wonderful people who helped me with this project. However that task felt pretty overwhelming because I knew I had 30-40 cards to send, and not only was I burnt out by June but I also had trouble finding the kind of custom cards I wanted with the budget I had. I wanted each card to feel special and unique, and I definitely didn't want to just buy bulk bland Thank You cards. It was important to me that each company I worked with felt like their card was personal and that they felt the gratitude I had for their generosity. 

I also felt pretty overwhelmed with the task of finding the perfect cards, finding the perfect envelope seals, ordering custom stamps, handwriting each card, and then getting them to the post office. This can feel like a lot whether or not you are fighting a chronic illness, but when you have a lot on your plate it can seem like a giant mountain to climb. This is where serendipity came into the mix, because at the most perfect time I was contacted by Paperless Post who asked if I wanted to try their service. I had never heard of Paperless Post prior to this, but upon first glance at their site I was in awe. They are, as their name suggests, an online paperless card service that helps you design the most stunning unique cards (right down to the envelopes) from the comfort of your bed. The cards look and feel so realistic, and are delivered directly to your recipient with an animation that opens and unfolds the card for them. I couldn't wait to try this service out, and I was instantly reinvigorated to create my custom Thank You cards! 

I wanted to take you all along with me through the process, to show you exactly how it works and how the final product looks when it's delivered to the recipient! I had a lot of fun playing around with my creativity, and I got to do what I love the most which is design. This whole project was a blast, so thank you to Paperless Post for allowing me to try out this service, because I am now a customer for life! Below you can see a preview of some of the different options they have, including brands like Rifle Paper Co and Kate Spade, whom I both love.
Picture
Picture
Picture
Step 1: Pick Out Your Card & Customize The Backdrop

Depending on your needs you can choose from a variety of options such as "Thank You" cards, Birthday cards, Invitations, Flyers and more! If you choose something with an RSVP option it includes a service that keeps track of all your RSVP's for you which is a neat and helpful perk. For my purposes I headed over to the Thank You card section, and I had 121 options to choose from (wowza)! You can narrow it down by color, shape, designer and price. Many of their cards are free but some cost a few coins (more on that later). There were SO many beautiful options, but I love the style of Kate Spade so I chose this adorable Floral vase design. Once I picked that I was prompted to choose a backdrop. The backdrop is the surface that your card will be opened on for the recipient. I went with a matching gold foil backdrop, but as you can see there are tons of options to choose from! 
Picture
Step 2: Customize Your Envelope

What makes Paperless Post so unique is that you get to customize everything down to a T. Absolutely nothing about the cards are generic, and each detail is personalized to make it extra special. This includes the inside of the envelope, the envelope itself, AND the stamp! I had a blast playing around with all the options and below were my options for the inside & outside.
Picture
Picture
Step 3: Write Your Message & Enter Recipients

When you make an account on Paperless Post you can also import your contacts into your address book to make it much easier when you want to send a card. That way all you have to do is click on the name (or names) of who you'd like to send to and it's instantly sent off via email! They even offer pre-scheduled cards which you can make way in advance and have sent out for you on the exact day/time you choose. Below is my finished design all put together.
Picture
And Voila, that's all! Creating these Thank You cards couldn't have possibly been easier or more enjoyable to do! I was dreading the task of ordering cards and stamps online and getting them to the post office. And even then I knew that they wouldn't be as customized and unique as I would have liked with the budget I had. Paperless Post really saved the day by not only helping me stay way under budget but also allowing me to get very creative in the most convenient way possible. I had 30+ Thank You cards to send and I created 6 different designs which were all customized with special touches! Not only that, but sending these via email made it easier for my contacts at larger companies to directly receive my card without it getting lost in a giant mail room. 

What Are Coins?
As I had mentioned briefly above, Paperless Post operates by using something called "coins" which you use for certain customizations. You buy the coins in a pack and use them as needed here or there. They do offer free cards, and if you stick with the stock designs then it won't cost you anything. But if you like to spruce it up like I do then coins come very handy! The pricing for coins are very inexpensive, and the more coins you buy the better the price is. They also often have deals where you buy X amount of coins and get X free. If you got the most basic coin package you'd get 10 coins for $5 which would send two of the cards I created (costing $2.50 each). Even that price is incredible for such customized cards that don't require extra stamps, but buying coins in bulk is the best option because it drops the price per card down by a huge amount. The price per coin in the basic package is .50 and the price per coin in the largest package is .09 so the more you buy the better the cost, and they also never expire! 


All in all this experience was such a breeze and took such a huge weight off of my shoulders! Below are photos of some of the other cards I also created and sent. I thought they were all so cute! What do you all think, do you like my picks? If you want to check out Paperless Post for yourself you can find them at PaperlessPost.com

xoxo,
Christina
Picture
Picture
0 Comments

All About Deer Fencing & Protecting Your Home: featuring DeerBusters!

4/30/2018

3 Comments

 
Picture
One of the questions I get asked the most by those who have Lyme disease (or are close to someone with Lyme), is "what can I do to protect my home from ticks?" Once you've been bit by a tick and it has turned your life upside down, the mere act of walking out on your own lawn feels terrifying. And, with each passing year the tick populations are multiplying at an alarming rate. Everywhere I look I see articles like, "A Tick Explosion is Coming This Summer," and its a scary thought. 

​If you are someone who has asked the question of, "how can I feel safe in my own front lawn?" then I am so happy to introduce you to DeerBusters, because their sole work is stopping ticks before they ever get a chance to enter your yard. DeerBusters is the industry leader for deer fencing and garden fencing options across the United States. Established in 1984, they have been wildlife and exclusion experts for over 30 years, and they really know their stuff. They are a one stop shop to get everything you need to protect your home, from deer fencing accessories to full systems & kits. Deer fencing is by far the best thing you can do for your home and your family to stop ticks from entering your lawn. If you stop the source of the ticks before they ever find a way onto your lawn to begin with then you can feel safe walking & playing in your yard again.

Ticks travel on large animals such as deer, and small animals such as mice & rabbits. This is also where they pick up the many diseases they carry, and as these animals run across your yard the ticks drop off and now become ready to latch onto you as soon as you set foot on your lawn. When you put up deer fencing you stop these animals from coming onto your yard to begin with, thus stopping the carrying of ticks onto your property. 

Below is a short video showing you how to measure/install the fence on your property, and also giving you an idea of how the fencing works:
"It has been proven through at least 3 scientific studies since 1998 that good deer fencing will reduce tick counts inside the deer fence perimeter by an average of 83%!" - Peter Aquilina

DeerBusters carries kits & fencing, which many people choose to install themselves. They certainly make it incredibly accessible to do, carrying full kits containing everything you would need & they have a great step by step video on how to install the fence. Think of DeerBusters as the one stop shop for everything in deer prevention & fencing! There are also professional installers who can act as the muscle for you and get the kits/fencing that you order all set up. This is a great option for someone who doesn't have the strength or ability to install it themselves.
Picture
The best part of deer fencing, is that with the right fence it is barely visible! It still makes your yard feel large and open, while keeping the deer and rodents out. It really is the best of both worlds! 

If you tried to copy the benefits of deer fencing by only spraying your yard with repellant, you would have to spray your yard every single day to get the same amount of protection. Yes, you heard that right.. every single day! No one has the time nor energy for that. Deer fencing is a one time installation that keeps your home protected with no extra added work afterwards. That is definitely my kind of protection! 

I never realized how close to home this issue was for me until 2 weeks ago when I went outside for 5 minutes, walked across my lawn & came inside to find a tick on me. It was a very small lone star tick, and it frightened me. My own front yard felt like a war zone with ticks & disease, and it's incredibly upsetting. Deer fencing is what makes the difference between seeing your lawn as a place to feel relaxed vs a place of fear. So if you are looking for better ways to protect your yard from disease carrying ticks then the very best way to do that is deer fencing. It isn't nearly as daunting as it seems (the kits make it very easy), and will be much more cost effective than any other option (such as spraying your lawn every single day).

xoxo,
Christina

Picture
Picture
3 Comments

Comparison: Vogmask vs Cambridge Mask - What Are The Differences? A Comprehensive Review

3/18/2018

59 Comments

 
This is not a sponsored post in any way. I bought all items, all opinions are my own & no one is paying me to write this review 
With the winter comes a large assortment of colds, flus & viruses, and if you have a chronic illness that can be straight up terrifying. It’s no surprise that many patients are making use of the relatively new masks on the market to help shield themselves from things floating around in the air. Having Lyme disease myself, I know that my immune system is much weaker and I need to help protect myself as much as I can.

I was on the market for a mask last year, and while I was researching my options I learned a lot (both online & by directly contacting the companies). I’m here now to break down the differences between the two most popular masks on the market: Vogmask & Cambridge Mask.

Spoiler alert: only one of these actually filters bacteria & viruses 

If you’re like me then you’ve likely seen a lot about Vogmasks, and depending on where you live geographically also Cambridge masks. I’ve heard of chronic illness warriors using them to filter smells, pollen, chemicals & germs. However, I was never really sure exactly what they promised to do vs what people used them for. It was important to me to have a guarantee before purchasing. Products can get hyped up big time on social media, and it can be hard to separate fact from fiction.
​So guess what? I did all the work for you! 


Let’s start with Vogmask..


​Vogmask

Picture
Vogmask is hands down the most popular of the two. I see advertising for them on various websites & on my social media feeds. I have seen people wear them on airplanes, around chemicals to filter VOC’s & near pollen to filter allergens. They come in many different colors, patterns & sizes to fit children & adults.

What does The Vogmask do?
According to the Vogmask official site:

“Vogmask is the world's first stylish filtering dust mask, made from the finest materials and designed to be the most comfortable dust mask ever while providing maximum protection from airborne particles. Our mission has never changed: to give the world a mask that makes you look great while providing the best protection from airborne particles. Vogmask is a no-risk, high-reward method to protect respiratory health..”
  • N99 filter layer, carbon filter, exhale valve
  • Filtering textile protects from 99% of airborne particles over .3 microns
  • Superior protection for PM 2.5 particles in air pollution

Vogmask is widely used in urban environments due to the high levels of air pollution

When I read that description I sort of scratched my head a little. Nowhere does it state that it will specifically filter bacteria/viruses. It does state that it uses a carbon filter and can be used for “traveling” but again only in terms of improving air quality. They speak in very vague terminology such as, “helps reduce exposure to airborne biological particles.” But that’s not giving me facts, that’s talking in uncertain terms.

So I decided to contact the company directly and inquire. I didn’t not use an identifiable email address, because I wanted an honest answer. I asked if their masks can:
1. Filter smells, and if so how well (is it MCS safe for gases/fumes?)
2. Can it be used for a compromised immune system and be guaranteed to filter out bacteria and viruses?

Their response? 1. Sort of 2. No

1. They say that it contains a carbon filter which can dampen smells (such as smoke from a fire). But otherwise no, it won’t stop gases, vapors, oils, or aerosols from coming through. So, sort of? But in summary, it’s useless for MCS.

2. Vogmask states point blank, “Does not eliminate the risk of illness, diseases, or infection.” And no, they can’t guarantee anything in terms of filtering germs.

I’m not gonna lie, I was pretty bummed. And maybe even a little deceived because they do excellent marketing to make it seem like their masks do more than they can actually guarantee. Prior to doing this research I had been sold on Vogmask, and had I not decided to dig a little I would have easily been fooled. You can find this same info on their website as well if you do a bit of digging. After I got this information I decided to change course and keep researching my options.

That's when I moved onto the Cambridge Mask..


Cambridge Mask

Picture
I found the Cambridge Mask while initially researching the Vogmask. They looked the same, and I sort of assumed they also worked the same. But, they’re completely different!

The Cambridge Mask also comes in a variety of colors and sizes (children to adults), and visually looks similar. However when I read the description from their website, the differences immediately stood out.

​What does The Cambridge Mask do?
According to the Cambridge Mask official site:

“The Cambridge Mask uses military grade filtration technology to filter out nearly 100% of particulate pollution, gases, as well as bacteria and viruses in a fashion friendly mask suitable for the whole family. Cambridge Masks have been independently tested by Nelson Labs, USA which confirmed almost 100% of particulate pollution, bacteria and viruses were successfully filtered when tested. The masks use a triple-layer filter system which will protect from a range of airborne contaminants.”

Test Performance:
  • 99.6% average filtration of viruses
  • 99.77% average filtration of bacteria
  • 99.7% average particulate filtration down to 0.3 microns

So what makes the Cambridge Mask different? The way it’s structured.

Again, from their site:

"The mask uses a unique triple filter system. The first layer catches larger pollution particles such as dust and PM10, followed by the Three-Ply Micro Particulate Filter which stops nearly 100% of smaller particulate matter such as PM2.5 and PM0.3. The inner filtration layer is made from a 100% pure activated carbon cloth, which was originally developed by the UK Ministry of Defence for chemical, biological and nuclear warfare protection. The carbon filter is also treated with silver to ensure almost 100% of harmful pathogens are removed and killed. The unique filter system allows the Cambridge Mask to perform better and last longer."

What does the Cambridge Mask filter?


  • Almost 100% of Particulate Matter (PM) including PM10, PM2.5 and PM0.3. These are the sort of particles you find in coal dust from power stations, diesel exhaust fumes, factory emissions and from construction works.
  • Almost 100% of gas based air pollution, including odours such as Volatile Organic Compounds (VOCs), Ozone, Benzathine, and Formaldehyde. These particulates you can find in petrol fumes, chemical emissions and from many industrial processes.
  • Almost 100% of harmful pathogens such as viruses and bacteria.
  • Other airborne irritants or allergens such as Dust, mould spores, some odours, pet allergens and pollen.

In summary, this mask is pretty darn incredible! I will note that while it does not claim to filter smell it does guarantee to filter VOC’s and other gases. But most importantly, it has military grade filters that guarantee to filter bacteria and viruses. If it’s good enough to be used in the military it’s dang sure good enough for me. I was sold. I bought my Cambridge mask last year and have been very happy with it all flu season long.

Both of these masks cost the same and both are backed by a money back guarantee. I was actually shocked by how difficult it was to find concrete facts on the Vogmask site, and in contrast what a large amount of information is available about the Cambridge Mask. The independent 3rd party testing was also crucial in my eyes, because it shows that an unbiased source was able to confirm their claims.

The purpose of this post is to do some fact checking and take the guess work out of it for you. Also, I wanted to share the info I learned with those of you who depend on Vogmask. I don’t want anyone being fooled into thinking their mask can do more than it really does and risk getting the flu, which is very severe this year. The more you know the better you can protect yourself. I want to help.

I’m aware that Vogmask has a bit of a cult following in the community, and I’m probably going to get some heat from this. That’s fine. Please know I don’t have anything against Vogmask what so ever. I think it’s great for doing what it can realistically do. But for my needs (and often many chronic illness patients needs) a mask like this must filter germs & it must guarantee it for the sake of my health. On top of that, with MCS I need to know exactly what I am or am not protected from since many gases/fumes/chemicals can make me very ill.

I hope this was informative & I hope that you can find the mask/protection that you need.

Xoxo,
Christina
59 Comments

How To Make A DIY "Emergency Kit" with Essential Oils + A Giveaway Featuring Young Living Oils!

1/15/2018

10 Comments

 
I am a huge lover of essential oils. I was introduced to them about 4 years ago, and at the time I knew next to nothing about how they work or what they do. I was dealing with chronic pain, anxiety, digestion issues, insomnia etc and when I was told that these oils could help in those areas of my life I was willing to give it a try. Within my first day of receiving my Young Living kit and using PanAway to relieve an awful stomach cramp, I was made into a believer. Since then I use essential oils on a regular basis. I have 5 bottles on my bedside table within reaching distance at all times, and you can find oil bottles scattered all throughout the house.

On top of having a giant oil collection, I also am someone who has some slight OCD when it comes to things being organized. If things are not exactly tidy and labeled and in their correct spot I get very stressed out. I love my oils, but I often find myself moving a bottle to a purse and forgetting it's there. Or I give my parents some bottles for the car and they leak or get left behind. I knew I needed to get more organized with my oils, but truthfully I didn't know where to start.

Got Oil Supplies reached out to me and asked if I would be interested in any of their essential oil storage and organization items. I of course immediately responded with a resounding yes! I particularly had my eye on their Travel Kit, because one thing I have been wanting to do for a long time now is have an essential oil kit set up and put away in case of emergency. We had a tornado scare about a year ago and as I sat in my basement waiting for the danger to pass I began to think about being more serious with having a kit I could grab in a moments notice which would have things I might need in a pinch. So today I'm going to show you how to put together an Emergency Kit, as well as a keychain Travel Bag and a roll on Bottle & Bag Set. Let's get organized! I'm also giving away an Emergency Kit + a bottle of Young Living Tea Tree oil, so read on to get details below.

Creating an Emergency Kit with Essential Oils

Picture
Picture
The Emergency Kit comes with 12 small bottles, 8 stick on labels, info cards discussing how to use each oil, and a metal tin to keep it all organized. The kit comes with 8 pre-printed labels, so this leaves you with 4 extra bottles to put other oils of your choice into. I also found the printed instruction cards to be very useful because they include info on how each oil can be used. For example it has a guide telling you if the oils can be ingested or not, if it can be used during pregnancy or not, and also what properties it has. I find myself often googling if a certain oil can be used internally or not, and I always forget which oils are "hot" oils, meaning that they need to be diluted down. The cards are my favorite part of the kit, because truth be told I thought I knew everything about these oils, but it turns out I actually had a lot to learn!
Picture
Picture
Once I got everything opened up I collected my needed oils and got to work. You have two choices when you start to fill up the bottles, and that is whether or not to pre mix and dilute or just use pure oils. If you go ahead and dilute in the small bottles provided then you will be all set to use it as is. But if you fill it up with straight essential oil then you will need to keep a dilution oil on hand as well. This choice is completely up to you!

I didn't want to mix up the oils so I did them one by one. I opened the small bottle, took off the stopper, filled it up and then immediately put the proper label on. It was actually still quite quick, and that way there was no confusion as to what anything was. It took me about 10 minutes in total to get everything filled up and labeled, and here was my final result.

Picture
Picture
Voila! It was really easy to make and now I have this put away next to the First Aid Kit in my home. You can also use this as a travel kit, and create it to take with you on vacation or gift it to someone who travels a lot.

Creating A To-Go Roll On Kit with Essential Oils

My next project was to create a key chain travel bag which contains 8 mini roll on vials which nicely zip up into a small bag that attaches to your key chain. You could also keep this in your purse since it folds up quite small and portable (approx 4" x 3" x 1"). This kit is useful if you want to have some oils on hand at all times, and keeping it on your key chain ensures that it will be with you anytime you leave the house.
Picture
Picture
For these I chose oils I desperately need to have on hand throughout the day. I use Digize religiously to help with all my digestive issues. I have Crohn's and prior to that I struggled with stomach difficulties for many years. I use it directly on my stomach for cramps and nausea, as well as to help with my digestion after meals. I also chose to put Valor and Joy into my kit because those two oils help immensely with anxiety. I apply Valor to my wrists and I put Joy directly over my heart. Those two together can instantly lift my mood and calm my mind.

I picked Thieves because it's currently cold and flu season, so I put that on the soles of my feet diligently to help my immune system. My whole family starts each day by making sure we put Thieves on and having it in a roller bottle is very convenient for on the go. I chose some other oils not shown in the photos such as Peppermint because I sniff it to curb nausea, and a blend of Peppermint and Wintergreen for pain relief. This kit is now ready to go and can be easily transferred to the keys of whoever might need it.

I also created a larger at home grab and go kit with roller bottles. I love roller bottles because everything is already pre-mixed and ready to be used. It also leaves your hands clean because the roller bottle does all the work, and I love this for times when I just can't get myself to move out of my bed.

Picture
Picture
I put together a kit with a few different mixtures that I can keep on hand in my bedside table drawer. One of the recipes I made was a copycat Vick's Vapor Rub that you can easily roll onto your chest for congestion. I got a 12 pack of the purple glass bottles and they hold 10ml each. So I made a few different combinations which I then put into the little slots in a carrying case and I was all set. I also labeled a few with these cute little stickers, such as my "Happy" roll on which contains the Joy oil.
Picture
Picture
So there it all is! I got very organized and it felt so satisfying to have everything put together and ready for when I need it. Got Oil Supplies has a ton of stuff on their site to help you get organized, and browsing their site inspires me to do even more. They were so kind to send me these items free of charge, but even better they were kind enough to give me an extra Travel Kit to giveaway so you that you can make your own Emergency Kit for yourself!

The Giveaway is for a Travel Kit (which I used for the Emergency Kit) and a 15ml bottle of Young Living Tea Tree Oil, which is just a little bonus I decided to throw in to help you get started on creating your kit. You can enter the Giveaway below!

If you are inspired to get organized yourself you can use code LADYOFLYME10 for 10% off your entire order on GotOilSupplies.com

xoxo,
Christina

Win An Essential Oil Travel Kit + Young Living Tea Tree Oil
10 Comments

Comparing & Trying 5 Self Tanners (with Photos): St. Tropez, Vita Liberata, and More. What's The Best Self Tanner for Chemical Sensitivity & Chronic Illnesses?

1/5/2018

0 Comments

 
These reviews are not paid for, not sponsored, and all items were purchased with my own money. No one asked me to do this, I just decided to chronicle my search for a perfect self tanner. I hope you enjoy!
If you want to read reviews of a few different self tanners from the eyes of someone with Multiple Chemical Sensitivities and allergies, you have come to the right place! If you struggle with sensitivity to smell or a chronic illness, you have also come to the right place. I have all of the above, and I tried out 5 different self tanners. I am here to review them all one by on and show you photos of it all.

There are a few things you should know about me right off the bat. I have MCS (multiple chemical sensitivities) and a lot of allergies. When I try any kind of new skin product there are a few big hurdles to jump through: 1. The smell: It can't have any added fragrance and it can't have a strong scent at all 2. The ingredients: it can't be full of stuff I can't pronounce because 9 times out of 10 I will react to it. Also, even some "natural" ingredients may have not so natural roots (i.e aren't organic) and the pesticides can for sure give me a rash or a migraine etc so I have to be really choosy. These are the 2 big criteria I have and are mainly what I will be judging on, plus of course how the tan itself looks & wears. I also have a chronic illness, and that means that things like showers are very exhausting for me, and a ton of work. It also means that standing for long periods of time is often a no-go. I am going to mention my experiences based on someone who is using pretty much all their energy for an entire day on this. I did all of these trials in the span of like 4 months or so. Also, please note that "self tanner smell" I speak of is just a stinky smell, not a chemical smell. Much like eggs or cooked broccoli. It isn't pleasant but it's not chemical in nature. 

So now that we have that squared away, let's jump into it. I'm doing this review because when I looked for MCS/allergy friendly self tanner reviews online I found 0 results. I understand that most people who are sick with illnesses don't typically prioritize being tan. I get it. For the last 4-5 years I hid from the sun because I was too sick, and I don't do well with heat. But I did always wish I could get a light glow, especially around the holidays. I see all my family during this time, and I know if I had a light glow it would make me look healthier. This is the most pale I've ever been, and while I have gotten compliments on how beautiful my porcelain skin is, it's still nice to have a change.

Some other things you should know about me is that prior to hiding from the sun due to illness I was always tan. My skin tans easily in the sun and it holds the tan for a long time. In high school I began getting spray tans in the winter to hold me over, and I never used tanning beds. I'm actually pretty well versed in spray tans & self tanners and have a lot of experience with them in the past. However, my skin hasn't seen more than 5 minutes of sun in YEARS, and I am extremely pale. This means that I'm starting from a shade of pale where the lightest tone of foundation matches me perfectly. Here are some photos ...
Pre-Tan Photos
My norm color/tan in years prior
Picture
Sometime in 2014 (I think)?
Picture
When I chopped my hair to donate.. oh so pale!

Beauty by Earth Organic Self Tanner Review (lady of lyme)
#1 - Beauty By Earth: Organic Self Tanner

This is the first item I bought and based on the reviews I was so excited to try it. I had been away from the self tanner game for quite some time and I was jazzed to find something like this product on the market. For one, it is full of only organic natural ingredients, and looked really pure. Every single ingredient is naturally derived, and it's pretty much a simple lotion of coconut oil, aloe, DHA (from sugar) and a few other ingredients. When it arrived I opened up the bottle and took a sniff. It smelled like coconuts, and was soooo delicious. It wasn't fake coconut either, it was a light and pleasant coconut oil scent but not overpowering at all. If you do OK with the smell of plain ole coconut oil then you will do great with this scent wise. I had no MCS type reactions to this at all while applying or during the developing.

I woke up on the day of the trail, showered, exfoliated, put lotion on rough areas and then got to work with my tanning mitt. My first issue right off the bat was that this lotion goes on clear so I had no idea how even it would or wouldn't be. There is no good way to see streaks or thicker areas so you can fix them before they develop. I used a tanning mitt and although this helped greatly it was still a much longer process to rub it all in than necessary. It soaked up quick on the skin so I had to keep reapplying over and over. By the time I finished I was exhausted and plopped back in bed. The developing time on this is 6-8 hours and by about the 3 hour mark that classic "tanning smell" of DHA began to become noticeable. By hour 4 it was down right obnoxious. I planned to keep it on for 6 hours but only made it to 5 and a half because that awful tanner smell was making me nauseous. I hopped in the shower, used body wash twice, and afterwards put some lavender body lotion on. This helped to mask the smell, but since the tan continues to develop for hours (even after the lotion is washed off), the dreaded smell was back not too long after. I realized I would have to stick it out and wash it off tomorrow when the processing was done. I slept terribly that night, reapplying lavender oil lotion 4x to try and mask the smell as much as possible.

Beauty by Earth Organic Self Tanner Review (lady of lyme)
I woke up the next day and boy oh boy did my tan develop..I was a splotchy mess. Since I didn't have any color to guide me I had missed spots and left streaks all over my arms. I had areas that I accidentally applied thicker layers to, so parts of my arm had darker colored splotches. To top it all off one arm was noticeably darker than the other. Oh, and I also still smelled terrible. I could hardly wait to hop in the shower and do a deep scrub. I had to scrub hard to even things out, but once I got out of the shower it looked OK. It wasn't orange, it evened out so/so, plus the smell was gone. But the work it took to get to this point was just way too much. Especially if you have a chronic illness and/or sensitivity to smells. I do not have the kind of energy needed for 3 showers, 2 deep scrubs, and 1 incredibly long session to apply it (plus the headache from the developing smell). There is no way I could do this weekly or really even monthly, plus it wasn't worth it. The color lasted about 4-5 days and was a bit more orange while fading than I would like. However, props for it not transferring anything onto my white sheets. That was a real bonus. I did try this again a second time and tried washing it off at hour 4 to see if its any better... it's not. The self tanner smell is just as pungent and I was just as streaky (until I exfoliated for a solid 10 minutes). I only WISH I had photos to show, but sadly I uploaded them for an Amazon review and deleted them off my phone since I hardly have any space left on it, and the Amazon review didn't post. Sooo, I lost them. I was counting on you Amazon, and you failed me! I will however link to a review photo here which looked exactly how I did. So, to recap Beauty By Earth:

Pros:
  • No added fragrance, just has a light coconut oil smell
  • All organic and natural ingredients, none of which I had an allergic reaction to or any issues with MCS
  • Pretty moisturizing to the skin
  • The tan did not transfer onto my white sheets or my clothes

Cons:
  • Self tanner developing smell is so strong and pretty awful for a solid 12-18 hours after application, even after being washed off.
  • The lotion applies clear and therefore it's hard to make sure it doesn't apply streaky. Even with me being well versed in tanning lotions I still struggled a lot
  • Takes a lot of time to apply because it goes on clear and soaks in the skin fast I had to keep reapplying and I was exhausted 15 minutes later.
  • Takes a lot of exfoliating the following day to even out the tan
  • Color only lasts about 4-5 days
  • Can be a bit more on the orange side
  • It did tint my white towels a bit brown/orange the following day post shower
  • Calls for 3 showers: 1 to pre-exfoliate, 1 to rinse off smell, 1 long one the next day to exfoliate off streaks.

You can check out the full product listing here

St. Tropez Express Tan Mousse Review (lady of lyme)
#2 - St. Tropez Express 1 Hour Bronzing Mousse

Okay so let me say right off the bat that this is NOT fragrance free. But let me explain why I tried it. The bottle advertises that it has a "patented" smell blocker, which tricks the olfactory senses into not smelling that dreaded self tanner smell. The reviews said it had no self tanner smell and was very pleasant. Granted, I am judging on normal peoples noses, not someone sensitive like myself. I knew it had some unsavory ingredients in it too, but what really sold me was the "express" tan aspect. You only have to leave it on for 1 hour, and I thought that the smell blocker would just mean I smelled absolutely nothing. But.. yeah, that is not the case at all.

So just like before I woke up, did a good scrub, put on lotion in my rough spots etc and got to work. The St. Tropez foam is tinted so you can see where it's going, however the fragrance smell was so intense! I mean, this stuff was floral scented in such a strong way that I got an instant headache and my heart started pounding out of my chest by 20 seconds in. However, I had already applied it to my entire left arm so I committed. I thought it would fade and I would be fine. Let me tell you, I seriously struggled to get it on just my arms and chest. I stopped there and laid down in bed because my heart was jumping out of my chest. My plan was to make it to 1 hour so I laid down, took Benadryl, and listened to calming music all while still wearing my Cambridge mask. While the mask helped a great deal, it could not prevent this insanely strong perfume fragrance from coming through. I laid flat on my back and my heart raced at 120 the entire time. I made it to the 1 hour mark and washed it off twice, all while gasping for air. It was awful. I had a full blown migraine afterwards and I felt miserable for 2 days afterwards. I knew in that moment I would never put myself through that ever again.

St. Tropez Express Tan Mousse Review (lady of lyme)
After leaving the St. Tropez on for 1 Hour
I assessed things the next day and realized that 1 hour is almost useless. I mean, I am so pale and even for me it barely did anything in terms of giving me a color. I concluded that it would need to be left on for at least 2 or perhaps all 3 hours in order to achieve a glow that is worth it. However, the color tan it gave was a true brownish tan and had no orange tones at all. I only had a medium level self tanner smell which I was thankful for, and it was not streaky. I put it on in a rush but even then I had 0 streak and it went on pretty even. So, let's recap the St. Tropez Express Tan:

Pros:
  • Tinted mousse so it's easy to see where it's going
  • Applies well and you don't need a lot for it to easily glide on
  • Did not streak
  • Did not have an orange tone color
  • Did not have a bad dreaded tan smell. It was there, but it was tolerable
  • Tan did not transfer onto my white sheets or clothes.

Cons:
  • Absolutely not MCS friendly. It has a harsh fragrance smell that made me sick for 2 days
  • The fragrance is hard to wash off in the shower
  • Called for about 4 showers. 1 to pre-exfoliate, 1 to rinse off, 1 more to get smell off, and one the next day to get lingering fragrance off.
  • 1 hour isn't useful although that's how it is advertised
  • Absolutely not allergy friendly. I got a few skin itchy rashes from it
  • With the 1 hour develop the color lasted barely 3 days

You can check out the full product listing here

Vita Liberata 10 Minute Tan Review (lady of lyme)
#3: Vita Liberata 10 Minute Tan

I learned my lesson after that disaster and I went back to the drawing board. I now knew more of what I wanted and what I was looking for in a self tanner. It became obvious that the self tanner developing smell was going to be a point of contention for me. It also became obvious that the shorter the time it took, the better. This is when I stumbled upon the 10 Minute Tan. It toots things like only needing 10-20 minutes on before you can wash it off, to having no added fragrance, to using only organic ingredients. To my lovely surprise when it arrived I took a sniff and it indeed did not really have much of a smell. It has some essential oils so it had a light citrus scent with a tiny hint of self tanner. But it was super mild and tolerable.

The 10 Minute Tan is a non-toxic organic cream that is free of parabens, perfume, alcohol and harsh chemicals.
I was very ready to give this a try! So I hopped in the shower, exfoliated, put on lotion on my palms, knuckles etc, and got to work with my tanning mitt. This lotion is tinted, which makes it super easy to apply and avoid streaks. It also has a smooth consistency that goes on like a dream, and doesn't soak into the skin too quickly. Application was a breeze, it took max 3-4 minutes and had no bad smell! I had no MCS reaction at all, and no issues in the scent department what so ever. I laid down in bed and waited 30 minutes then rinsed off in the shower. As the color continued to develop I had a slight self tanner smell, but it was very faint. This had the lightest self tanner smell out of all the options I had tried to this point which was a big win.

Vita Liberata 10 Minute Tan Review (lady of lyme)
Pre-application & the day after
The next day I checked out my results and loved what I saw. The color developed beautifully in a natural brown tan color with 0 streaks. It went on evenly all over and looked natural. I got quite a few shades darker, and compared to Option #1 the self tanner smell wasn't nearly as bad. I did however still have to shower again when I woke up because the self tanner smell amplified a bit during the night. It really isn't very strong or bothersome, but it was enough to where I felt like a shower was needed. This was the most pain-free of all the options I tried to this point in terms of it taking the least energy and coming out the nicest. It didn't need a long scrub and shower the next day to even it out, which I appreciated. It didn't exhaust me nearly as much as the others, and the color lasted almost a week. I loved the idea that I could do this a few days before the holidays and have that glow last me all the way through. By now I had declared that this was my absolutely favorite of them all, and I contemplated stopping here... but as you see I still tested out more. Let's recap the 10 Minute Tan:

Pros:
  • No MCS reaction because there is no added fragrance
  • It has some essential oils which gave off a very light citrus scent that is soothing
  • Is tinted so I could see exactly where I applied it
  • Applied very smooth and fast
  • No allergic reaction upon application or while developing
  • No harsh nauseating self tanner smell while developing
  • It only has to stay on the skin for 10-30 mins
  • Creates an even non streaky color
  • Creates a brown tan with no orange tones at all
  • Tan lasts about a week
  • Tan did not transfer on to my white sheets or clothes

Cons:
  • Still needs 3 showers. 1 pre shower exfoliation, 1 rinse off, 1 shower next day to clean off rididual self tanner smell

You can check out the full product listing here

Vita Liberata 2-3 Week Mousse Review (Lady of Lyme)
#4: Vita Liberata Phenomenal 2-3 Week Mousse (Dark)

After I had such a great experience with the 10 minute tan, I got curious about other Vita Liberata products. As I began to research I found that their most popular product is the Phenomenal 2-3 Week Tan Mousse. Fun fact, this is what the Victoria's Secret models use (I learned that as I researched). I saw the product and instantly was intrigued by the 2-3 week wear. If I could have my tan last double or triple the time of other self tanners then I could do one application mid December and be set till the New Year. That is music to the ears of someone with a chronic illness. Minimal effort, maximum results. The 2-3 week Mousse also contains organic ingredients & also is devoid of any fragrance. It does however toot an 'odor removing technology' to block the stinky self tanner developing scent, but according to reviewers it is completely scentless.  Now THAT is my kind of smell blocker!

When the Mousse arrived I took it out of the box and immediately did a preemptive smell test. And guess what? No smell!! It has the most mild hint of self tanner smell but even my sensitive nose could hardly detect it. I was so excited to give it a go the next day.

I got up the next day & did the usual song and dance of showering, exfoliating and applying lotion to rough spots. I then got my tanning mitt & got to work. The Mousse is tinted and makes it super easy to see where it's being applied. It glides on very easily (the most easily of them all) not soaking in too quickly so I had time to work it in without being rushed. I have to stress this, because I still am flabbergasted by it, but it had no smell!! I applied it all over, even up my neck and chest, and I smelled nothing. This smell blocker of theirs is a dream. It was super quick to apply, dried within 5 minutes and didn't rub off on my clothes or sheets. This also was the most tinted of all, and when I finished I already had a bronze all over. So if you want something which can give instant color, this is a winner.

The instructions say to leave the Mousse on for 4-8 hours before washing off. It also says at this point it can be reapplied for a second layer to make it darker, but I opted not to do that. My plan was to wash it off at the 8 hour mark, but honestly I just went to bed instead. The reason for this is because it had 0 bad smell, and there was no real need for a rinse off or shower ASAP. The others either 1. had a strong self tanner smell so I had to shower 2. had a fragrance smell so I had to shower, or 3. called for it to be rinsed off (ie. the 10 minute tan). With this, I had no obligation to do so which was great. When I went to bed I looked pretty dark from the bronzer + developing tan and figured I would assess in the morning.

Picture
Vita Liberata 2-3 Week Mousse Review (Lady of Lyme)
Pre application & the day after (post shower)
​The next day I got up and took my time getting to the shower. I still barely had a self tanner smell at all (no joke!). But I was splotchy from the tinted bronzer and I knew I needed to wash it all off to see what had developed. I will say, when I showered I did lose some color. The tinted bronzer was a bit deceiving because it made me feel like I was way darker than I actually was. Post wash off I was still tan, but much less than it showed. I guess the tint is a blessing and a curse in that regard. I can see now why they recommend a second application to really cement in the color for the 2-3 weeks. For my use though it was still great since I only wanted to achieve a light glow.

Although I was slightly let down by the color at first I otherwise could not be more impressed with this product. Out of everything this had the absolute least smell. There is no fragrance in the product and the smell blocking technology meant I smelled virtually no self tanner smell. Even on Day 2 it was so mild. To top it off I also didn't have to shower until the next day, which means it only took 2 showers, not 3 like the others. This truly is the epitome of something you put on and forget about, which makes it highly convenient for a chronic illness. The wear on this was about 10 days. I suspect if I had done the double initial application that it would have gone 2 weeks or more. Next time that's what I will try out! Let's recap the 2-3 Week Mousse:

Pros:
  • No MCS reaction because of 0 added fragrance (and no real smell to the mousse itself)
  • Almost no self-tanner smell, even on developing day 2
  • No allergic reactions on the skin
  • Tinted mousse so I could see where I was applying
  • Very quick to apply and goes on smoothly
  • Creates an even non streaky color
  • Develops into a nice brown tone, not orangey
  • Only needed 2 showers
  • Did not stain white sheets or towels
  • Tan lasts about 10 days (and faded evenly)
  • I could put the tan on and forget about it until the next day

Cons: 
  • Bit more pricey than the rest

You can check out the full product listing here

St. Tropez In Shower Lotion Review
#5: St. Tropez In Shower Lotion Self Tanner (Medium)

I know I know, I had already been burned by St. Tropez before so why did I try another product? Well, it's because I'm a girl on a mission for convenience and ease. And this product promises to make you tan by simply putting it on in the shower (while wet), and rinsing it off after 3 minutes. That's it! My interest was peaked, and the photos of the before and after looked pretty darn good. The thought of doing this when I shower and not having to do anything extra was very appealing to me, and so I gave it a whirl.

This time however, I came prepared. I grabbed my Cambridge mask and carefully smelled the product before application. And guess what? It smelled awful. It had such a strong perfume/floral scent that as soon as I opened it up I started coughing. I honestly do not know why on earth anyone would need to put that strong of a fragrance into a body wash, but alas, they did.

So once I smelled it and reacted I stopped there. I didn't suscept myself to actually applying it and going through another 2 day migraine. I can't attest to what it did or didn't do, but on smell alone it was a big ole swing and a miss in my book.

St. Tropez In Shower Lotion Review
You can check out the full product listing here

Summary:

In summary, the 10 Minute Tan & The 2-3 Week Mousse from Vita Liberata were my top favorites. I love them both for differing reasons. I think the 10 Minute Tan gave me an initial darker color, but it didn't last as long. And the Mousse didn't get as dark with just 1 application, but it lasted longer overall. The Mousse probably still has an edge because of the smell blocking technology that gave me the least self tanner smell of them all. The convenience of both of these products are pretty great, but the real joy is their lack of smell. To find something that doesn't trigger my MCS and doesn't make me nauseous while it develops is such a huge win. I will likely be using the mousse during the holidays with the initial double application, and although that will require 3 showers, if it lasts me close to 3 weeks it will totally be worth it!

0 Comments
<<Previous

    Welcome!

    This is the area of my blog devoted to Reviews of books, items, supplements etc, as well as Interviews with people in the Lyme Disease community.
    NONE of the posts are sponsored, and ALL items discussed are bought and paid for myself unless noted otherwise in the post. You will also find some wonderful Guest Posts by incredible writers in the Chronic Illness community.


    Lauren's Hope Medical ID

    Archives

    April 2022
    May 2020
    February 2020
    January 2019
    September 2018
    July 2018
    April 2018
    March 2018
    January 2018
    November 2017
    September 2017
    February 2017

    Categories

    All
    Book Reviews
    Product Reviews

    RSS Feed

© 2011 Lady of Lyme™. All Rights Reserved.

Terms and Conditions  - Privacy Policy
Connect with me:
Facebook
Twitter
Contact   About   Email Me


Lady of Lyme is a participant in the Amazon Services LLC Associates Program, an affiliate advertising program designed to provide a means for sites to earn advertising fees by advertising and linking to amazon.com.