In May I held a giant month long event for Lyme Disease Awareness Month, with tons and tons of Giveaways for patients fighting through chronic illnesses. I was incredibly thankful to the companies who donated their items, and to the Sponsors who believed in me. When the event was over I knew I wanted to send a formal Thank You card to all of the wonderful people who helped me with this project. However that task felt pretty overwhelming because I knew I had 30-40 cards to send, and not only was I burnt out by June but I also had trouble finding the kind of custom cards I wanted with the budget I had. I wanted each card to feel special and unique, and I definitely didn't want to just buy bulk bland Thank You cards. It was important to me that each company I worked with felt like their card was personal and that they felt the gratitude I had for their generosity.
I also felt pretty overwhelmed with the task of finding the perfect cards, finding the perfect envelope seals, ordering custom stamps, handwriting each card, and then getting them to the post office. This can feel like a lot whether or not you are fighting a chronic illness, but when you have a lot on your plate it can seem like a giant mountain to climb. This is where serendipity came into the mix, because at the most perfect time I was contacted by Paperless Post who asked if I wanted to try their service. I had never heard of Paperless Post prior to this, but upon first glance at their site I was in awe. They are, as their name suggests, an online paperless card service that helps you design the most stunning unique cards (right down to the envelopes) from the comfort of your bed. The cards look and feel so realistic, and are delivered directly to your recipient with an animation that opens and unfolds the card for them. I couldn't wait to try this service out, and I was instantly reinvigorated to create my custom Thank You cards!
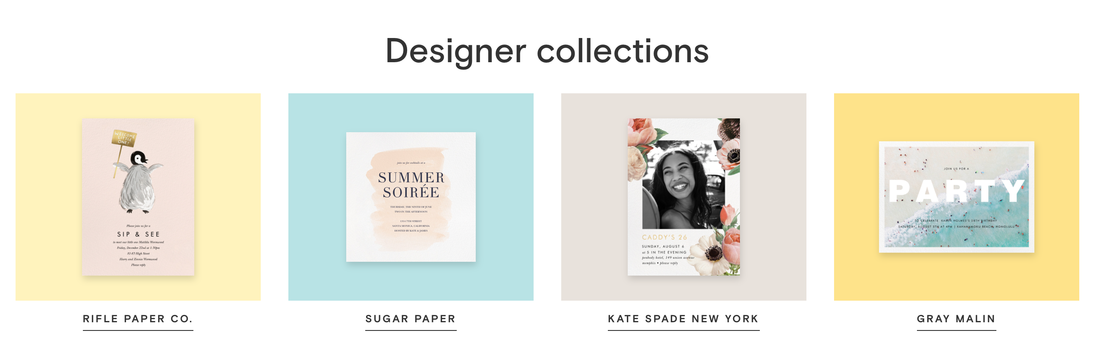
I wanted to take you all along with me through the process, to show you exactly how it works and how the final product looks when it's delivered to the recipient! I had a lot of fun playing around with my creativity, and I got to do what I love the most which is design. This whole project was a blast, so thank you to Paperless Post for allowing me to try out this service, because I am now a customer for life! Below you can see a preview of some of the different options they have, including brands like Rifle Paper Co and Kate Spade, whom I both love.
I also felt pretty overwhelmed with the task of finding the perfect cards, finding the perfect envelope seals, ordering custom stamps, handwriting each card, and then getting them to the post office. This can feel like a lot whether or not you are fighting a chronic illness, but when you have a lot on your plate it can seem like a giant mountain to climb. This is where serendipity came into the mix, because at the most perfect time I was contacted by Paperless Post who asked if I wanted to try their service. I had never heard of Paperless Post prior to this, but upon first glance at their site I was in awe. They are, as their name suggests, an online paperless card service that helps you design the most stunning unique cards (right down to the envelopes) from the comfort of your bed. The cards look and feel so realistic, and are delivered directly to your recipient with an animation that opens and unfolds the card for them. I couldn't wait to try this service out, and I was instantly reinvigorated to create my custom Thank You cards!
I wanted to take you all along with me through the process, to show you exactly how it works and how the final product looks when it's delivered to the recipient! I had a lot of fun playing around with my creativity, and I got to do what I love the most which is design. This whole project was a blast, so thank you to Paperless Post for allowing me to try out this service, because I am now a customer for life! Below you can see a preview of some of the different options they have, including brands like Rifle Paper Co and Kate Spade, whom I both love.
 |  |
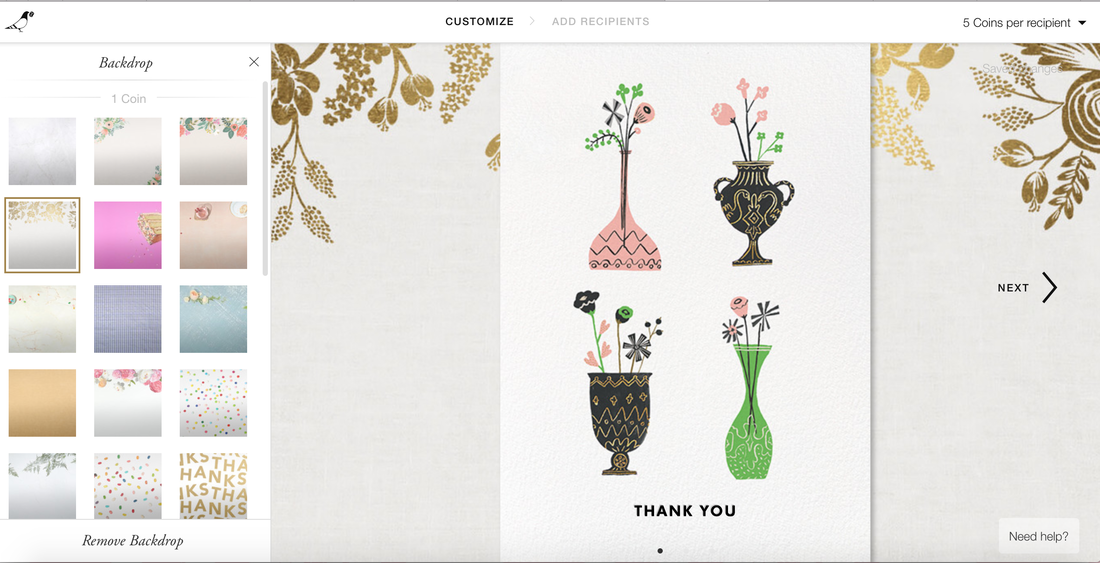
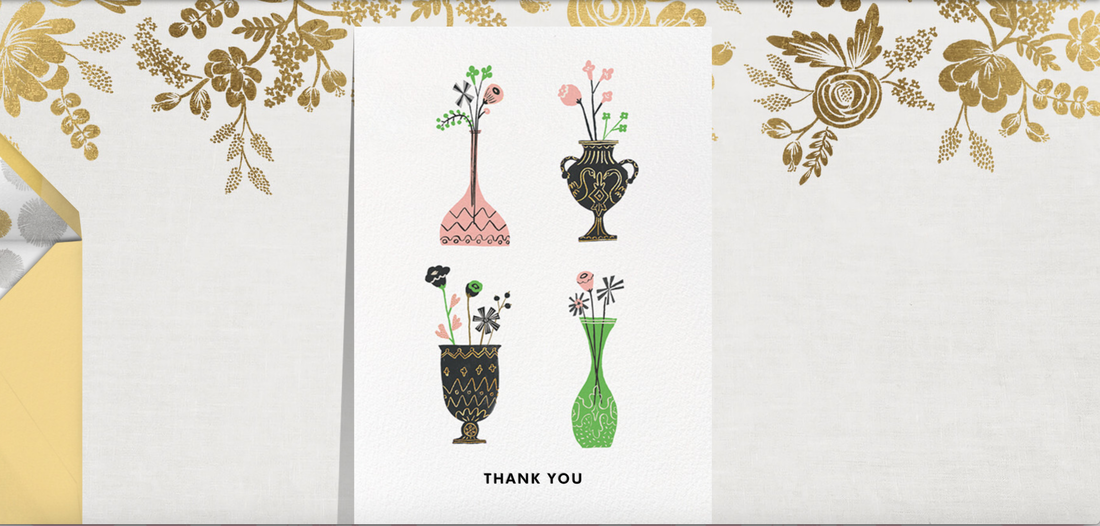
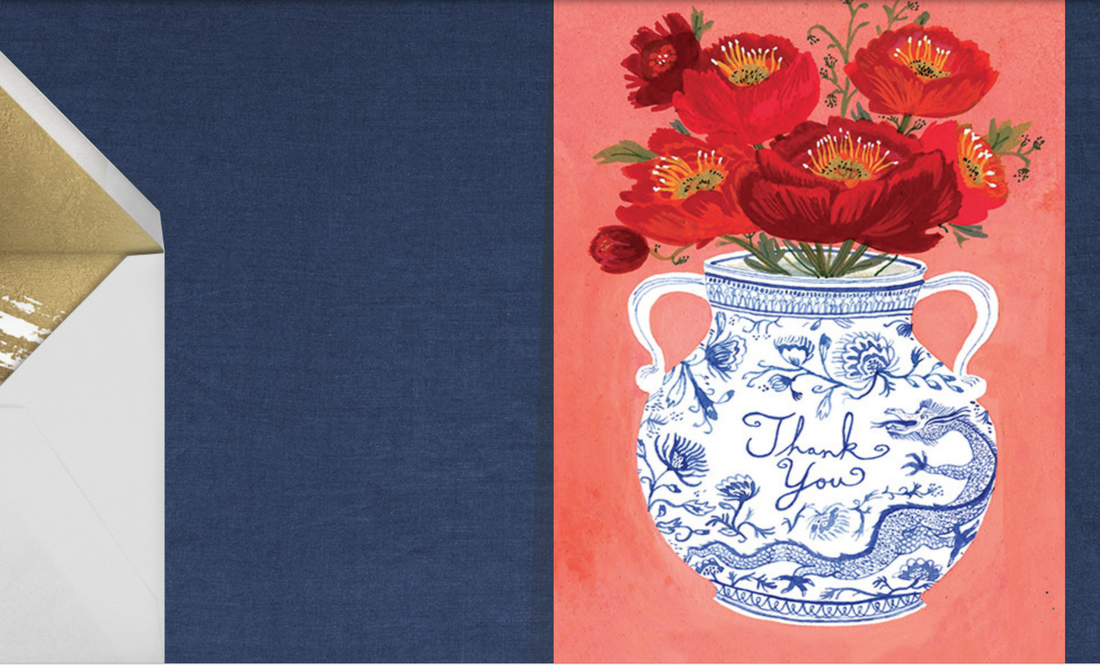
Step 1: Pick Out Your Card & Customize The Backdrop
Depending on your needs you can choose from a variety of options such as "Thank You" cards, Birthday cards, Invitations, Flyers and more! If you choose something with an RSVP option it includes a service that keeps track of all your RSVP's for you which is a neat and helpful perk. For my purposes I headed over to the Thank You card section, and I had 121 options to choose from (wowza)! You can narrow it down by color, shape, designer and price. Many of their cards are free but some cost a few coins (more on that later). There were SO many beautiful options, but I love the style of Kate Spade so I chose this adorable Floral vase design. Once I picked that I was prompted to choose a backdrop. The backdrop is the surface that your card will be opened on for the recipient. I went with a matching gold foil backdrop, but as you can see there are tons of options to choose from!
Depending on your needs you can choose from a variety of options such as "Thank You" cards, Birthday cards, Invitations, Flyers and more! If you choose something with an RSVP option it includes a service that keeps track of all your RSVP's for you which is a neat and helpful perk. For my purposes I headed over to the Thank You card section, and I had 121 options to choose from (wowza)! You can narrow it down by color, shape, designer and price. Many of their cards are free but some cost a few coins (more on that later). There were SO many beautiful options, but I love the style of Kate Spade so I chose this adorable Floral vase design. Once I picked that I was prompted to choose a backdrop. The backdrop is the surface that your card will be opened on for the recipient. I went with a matching gold foil backdrop, but as you can see there are tons of options to choose from!
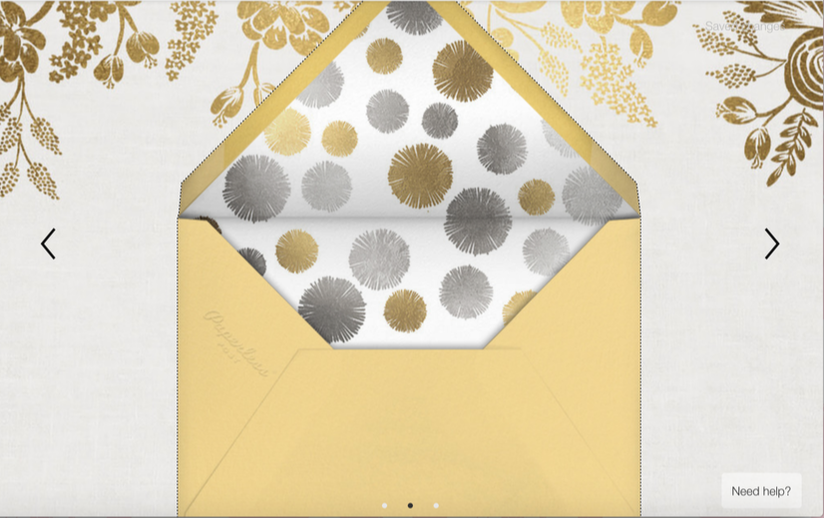
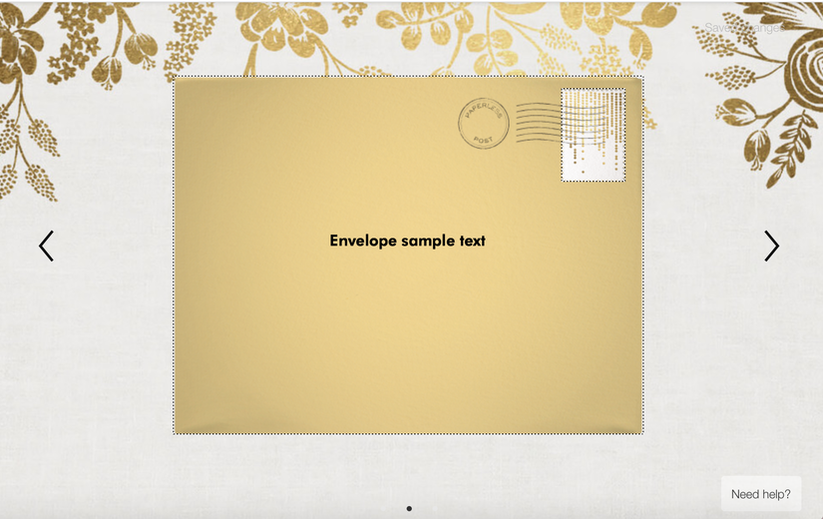
Step 2: Customize Your Envelope
What makes Paperless Post so unique is that you get to customize everything down to a T. Absolutely nothing about the cards are generic, and each detail is personalized to make it extra special. This includes the inside of the envelope, the envelope itself, AND the stamp! I had a blast playing around with all the options and below were my options for the inside & outside.
What makes Paperless Post so unique is that you get to customize everything down to a T. Absolutely nothing about the cards are generic, and each detail is personalized to make it extra special. This includes the inside of the envelope, the envelope itself, AND the stamp! I had a blast playing around with all the options and below were my options for the inside & outside.
 |  |
Step 3: Write Your Message & Enter Recipients
When you make an account on Paperless Post you can also import your contacts into your address book to make it much easier when you want to send a card. That way all you have to do is click on the name (or names) of who you'd like to send to and it's instantly sent off via email! They even offer pre-scheduled cards which you can make way in advance and have sent out for you on the exact day/time you choose. Below is my finished design all put together.
When you make an account on Paperless Post you can also import your contacts into your address book to make it much easier when you want to send a card. That way all you have to do is click on the name (or names) of who you'd like to send to and it's instantly sent off via email! They even offer pre-scheduled cards which you can make way in advance and have sent out for you on the exact day/time you choose. Below is my finished design all put together.
And Voila, that's all! Creating these Thank You cards couldn't have possibly been easier or more enjoyable to do! I was dreading the task of ordering cards and stamps online and getting them to the post office. And even then I knew that they wouldn't be as customized and unique as I would have liked with the budget I had. Paperless Post really saved the day by not only helping me stay way under budget but also allowing me to get very creative in the most convenient way possible. I had 30+ Thank You cards to send and I created 6 different designs which were all customized with special touches! Not only that, but sending these via email made it easier for my contacts at larger companies to directly receive my card without it getting lost in a giant mail room.
What Are Coins?
As I had mentioned briefly above, Paperless Post operates by using something called "coins" which you use for certain customizations. You buy the coins in a pack and use them as needed here or there. They do offer free cards, and if you stick with the stock designs then it won't cost you anything. But if you like to spruce it up like I do then coins come very handy! The pricing for coins are very inexpensive, and the more coins you buy the better the price is. They also often have deals where you buy X amount of coins and get X free. If you got the most basic coin package you'd get 10 coins for $5 which would send two of the cards I created (costing $2.50 each). Even that price is incredible for such customized cards that don't require extra stamps, but buying coins in bulk is the best option because it drops the price per card down by a huge amount. The price per coin in the basic package is .50 and the price per coin in the largest package is .09 so the more you buy the better the cost, and they also never expire!
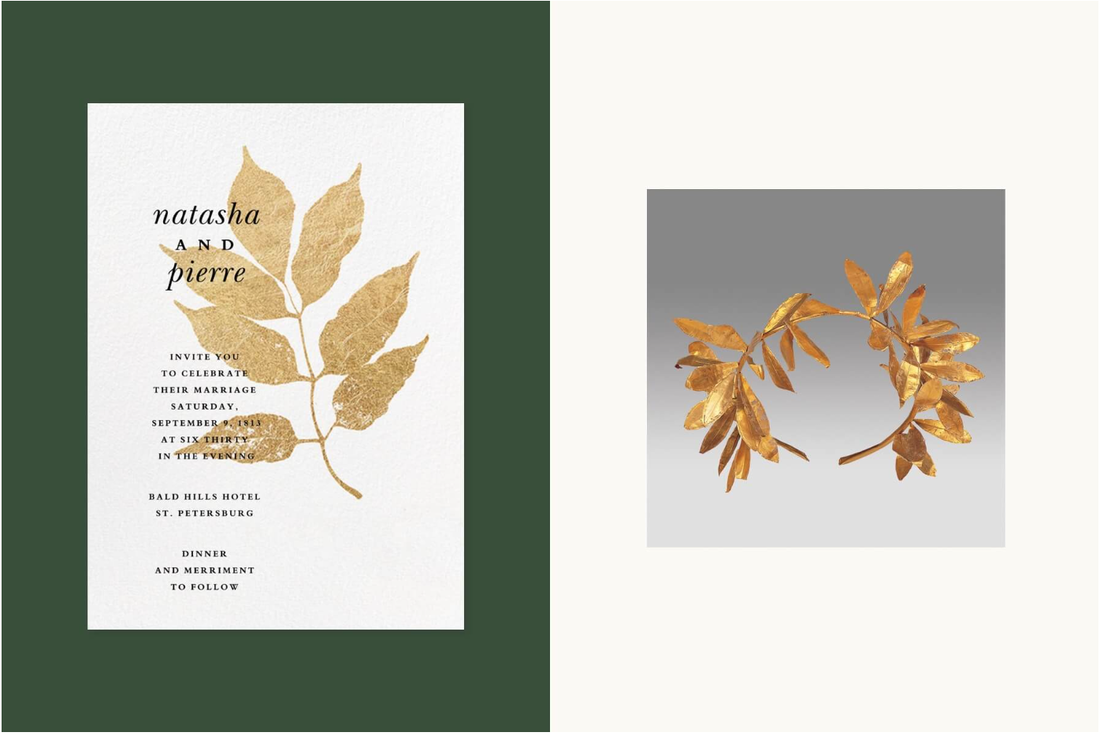
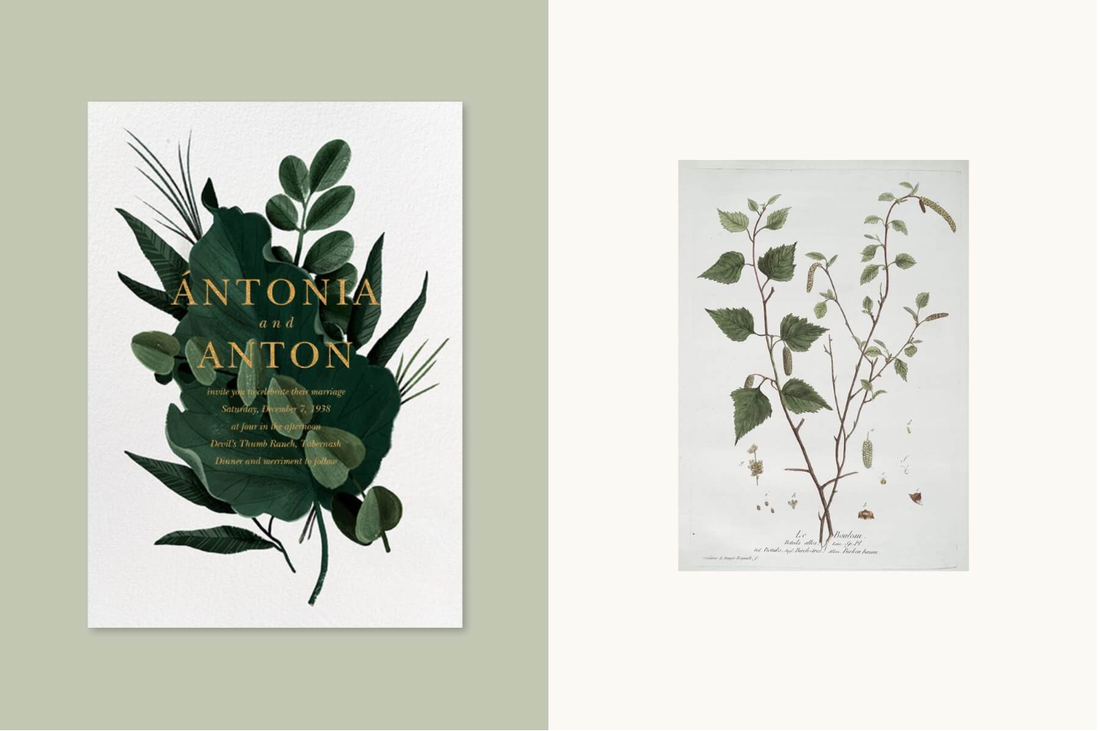
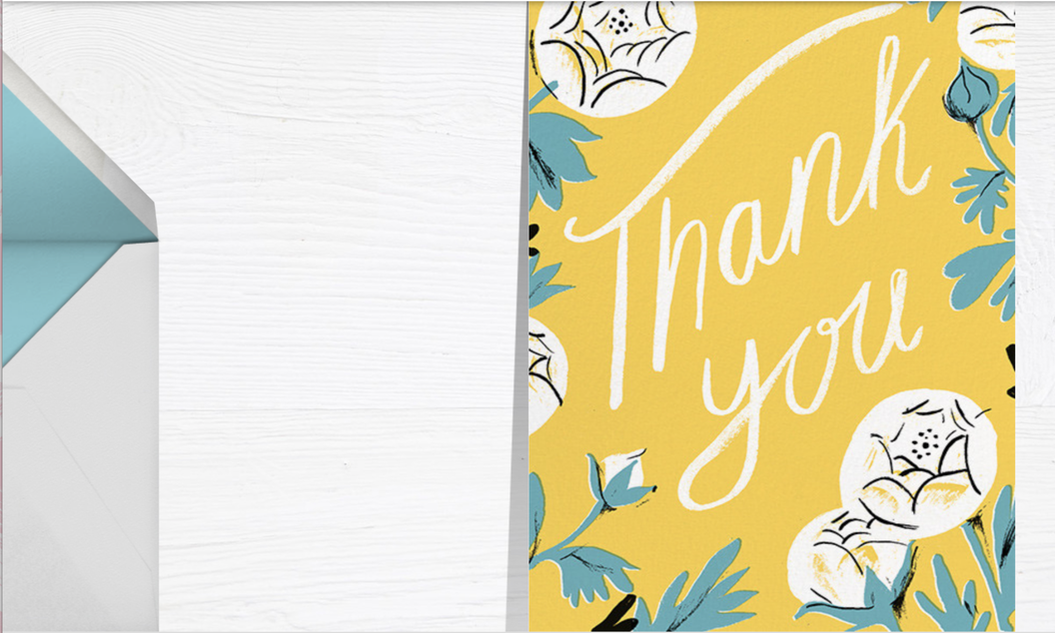
All in all this experience was such a breeze and took such a huge weight off of my shoulders! Below are photos of some of the other cards I also created and sent. I thought they were all so cute! What do you all think, do you like my picks? If you want to check out Paperless Post for yourself you can find them at PaperlessPost.com
xoxo,
Christina
What Are Coins?
As I had mentioned briefly above, Paperless Post operates by using something called "coins" which you use for certain customizations. You buy the coins in a pack and use them as needed here or there. They do offer free cards, and if you stick with the stock designs then it won't cost you anything. But if you like to spruce it up like I do then coins come very handy! The pricing for coins are very inexpensive, and the more coins you buy the better the price is. They also often have deals where you buy X amount of coins and get X free. If you got the most basic coin package you'd get 10 coins for $5 which would send two of the cards I created (costing $2.50 each). Even that price is incredible for such customized cards that don't require extra stamps, but buying coins in bulk is the best option because it drops the price per card down by a huge amount. The price per coin in the basic package is .50 and the price per coin in the largest package is .09 so the more you buy the better the cost, and they also never expire!
All in all this experience was such a breeze and took such a huge weight off of my shoulders! Below are photos of some of the other cards I also created and sent. I thought they were all so cute! What do you all think, do you like my picks? If you want to check out Paperless Post for yourself you can find them at PaperlessPost.com
xoxo,
Christina
 |  |

 RSS Feed